
What Is The Best psi Air Pressure For Using An Airbrush For Modeling
The air pressure you should airbrush at for perfect results is the lowest pressure possible that still allows you to get a smooth and properly atomised paint flow from your airbrush, and typically ranges from between 10 psi to 25 psi depending on various factors.
How much air pressure to use in an airbrush has this variance due to a number of factors which will be discussed (complete with a detailed action plan for you to follow yourself! 👊), but most notably, your nozzle and needle size, and the level of fine detail you either do or do not need.
Of course, the air pressure for your airbrush as specified by the manufacturer is great, but…
…it’s not always perfect for every job, as we’ll discover.
Often times the air pressure will go hand in hand with the viscosity of the paint, that is, how much it’s been thinned.
There’s seldom a one-size-fits-all answer, but rather a suitable ‘range’ for your personal airbrushing setup and the paint to thinner ratio.
Let’s first dive into the factors that will impact how much pressure we need, and then we’ll start nailing down some exact psi figures for various airbrush specs and paint work requirements in a step-by-step process…
How Much You Have Thinned Your Paint Impacts Airbrush Pressure Requirements
For a given airbrush, let’s say yours 😎, thinner paint will require less air pressure to atomise properly and give an optimal spray pattern, and thicker paint will require more air pressure.
As mentioned above, air pressure and thinned paint tend to go hand in hand and both will require some experimenting with for any given airbrush.
Do not assume that because you may have found the perfect thinning ratio and air pressure ratio for your airbrush that it will automatically work as perfectly in any other airbrush.
It can be extremely hard to fathom out how to find the best setup when you have the two variables of air pressure and paint viscosity (level of thinning) to figure out, but there is a way to logically approach this, and while we’ll go over that in great detail later in the article we’ll touch on it now.
Remember that you’re trying to get the lowest pressure possible while still having as close to perfect paint atomisation as possible (i.e. no spidering from thin paint and no spattering from thick paint).
It’s unlikely that you’d thin the paint as low as 50/50 paint to thinners, but you could start there and see what the lowest pressure is that gives you satisfactory results.
If you’re finding the paint is just too thin then increase the ratio of paint to thinners and increase the air pressure slightly to compensate – this is part of the process of testing which air pressure works best, however…
This all seems intuitive and easy enough, but there are other factors you must take into consideration…
The Type Of Airbrush Are You Using Impacts Airbrush Pressure Requirements
No two airbrushes are made the same, an each one will give an optimal spray pattern at slightly different air pressures.
The main airbrush equipment factors affecting the air pressure you require include:
- The overall quality of the airbrush;
- The nozzle and needle size;
- Whether your airbrush is a siphon feed, side feed, or gravity feed; and
- Whether your airbrush is an internal or external mix airbrush;
Let’s break down each on in turn to get a greater understanding of how each one will affect the quality of paintwork you get on your models…
The Overall Quality Of The Airbrush
The higher quality airbrushes will do a better job of atomising the paint (all other things being equal) at a lower pressure than lower quality airbrushes.
In this case you pretty much get what you pay for.
So if our ideal air pressure goal is to get properly atomised paint at the lowest pressure possible, then you’ll want a higher quality airbrush that will have this built in.
Ultimately it will serve you better to avoid the cheap airbrushes and go with the tried and tested brands that are a little more pricey (but won’t necessarily break the bank).
The Nozzle And Needle Size
It’s not common that you can change nozzle and needle sizes on the one airbrush, so really what you’re considering here is what size your particular nozzle and needle combination is relative to general rule of thumb advice on airbrushing air pressure.
Typically, airbrush nozzle and needle sizes for airbrushing plastic models and kits ranges between 0.2 mm and 0.5 mm, with 0.35 mm being the middle ground.
👍 You can get more information on the perfect nozzle size for painting scale models by clicking here.
Generally speaking, a smaller nozzle/needle size will require a lower air pressure (and more thinned paint) and a larger nozzle/needle size will require higher air pressure (and can handle less thinned paint) in order to properly atomise the paint.
If you are using a 0.2 mm nozzle then you would want to potentially lower your airbrushing pressure just slightly from the rule of thumb recommendations, and if you’re using a 0.5 mm nozzle then you may benefit from potentially raising the pressure.
If you’re using a 0.35 mm nozzle then stick with what people generally recommend to start with (which I’ll cover shortly).
👍 For more detailed information on nozzle and needle sizes and how various different options can improve your airbrushing, see this in-depth article.
Siphon Feed Vs Side Feed Vs Gravity Feed Airbrushes
How your airbrush holds the paint matters, with siphon feed generally requiring a little more pressure get the paint into the airflow given it’s fighting against gravity.
However a gravity feed airbrush has the opposite effect, with gravity aiding the flow of paint into the airflow where it is atomised.
Gravity feed airbrushes tend to require lower air pressure to get the best spray pattern and results, all other things being equal.
And then we have side feed airbrushes, which are a little less common and have the cut sitting on the side of the airbrush.
Side feed airbrushes still rely mainly on the flow of air to pull the paint through, much like the siphon feed does, however paint in a side feed cup is not fighting gravity so it requires an air pressure somewhere in between that of siphon feed and gravity feed.
So all things being equal:
- Siphon Feed : slightly higher pressure
- Gravity Feed : slightly lower pressure
- Side Feed : No effective change
Internal Vs External Mix Airbrushes
Practically speaking, internal mix airbrushes (the paint being atomised by the air inside the airbrush) will need slightly less air pressure than external mix airbrushes (the paint being atomised outside the airbrush).
Usually, external mix airbrushes will use a siphon feed system, which is also why they require a greater air pressure.
The opposite is true of gravity feed and side feed airbrushes that tend to be internal mix.
The Type Of Paint Are You Using In Your Airbrush Impacts Airbrush Pressure Requirements
Some paints, such as Zero Paints or the Vallejo Air range, are bottled ‘airbrush-ready’.
They are not only pre-thinned but also have more finely ground pigments which make them flow through an airbrush and atomise correctly at lower air pressure settings.
In the real world this may make only a small difference to air pressure requirements but it’s worth noting none the less, in that if you use these paints you may be able to drop the pressure slightly than when compared to paints you need to thin yourself.
Having said this, there may be limitations on whether you can use airbrush-ready paints or not…
This comes down to the specific colour availability in the range you’re considering, and the availability to simply purchase even if you do find the right colour.
Don’t stress if you can’t get your hands on airbrush-ready paints, most model building paint lines are more than suitable for airbrushing and with correct thinning and air pressure control you’ll be able to get results just as good as what airbrush-ready paints will give.
👍 For more information on thinning Tamiya paints, specifically their TS lacquer range, click this link.
Whether You Want Fine Details Or A Large Spray Pattern Impacts Airbrush Pressure Requirements
To get fine details you’ll typically need to use a smaller nozzle size, and for a larger spray pattern with greater airbrushing coverage you’ll want a larger nozzle and needle size.
As mentioned earlier regarding nozzle and needle sizes, the smaller you go the lower the air pressure (with slightly thinner paint) and the larger you go the greater the air pressure you’ll need (with relatively thicker paint).
So, of course, it stands to reason then that if you require finer detail painting from your airbrush you’ll be at a lower air pressure to go with the corresponding smaller nozzle size.
And for better and thicker coverage that comes with a larger nozzle size you’ll want more air pressure.
Distance Considerations
The distance from the model you hold you airbrush at will also have a bearing on how much pressure you need, however this is closely linked to the level of detail required.
All things being equal, the further you are away from the part that you’re painting the more air pressure you’ll need simply to have the paint reach the part.
Move the airbrush too far away though and you’ll get problems with the paint starting to dry before it gets to the part you’re painting making it more matt, or giving it more of a orange peel texture.
Again, all other things being equal, the closer you are to the job the less air pressure you’ll require so that you don’t drench the part and get runs or pooling paint.
As you can see, there’s a million and one combinations of airbrushing variables you can play with to get the perfect airbrushing air pressure (and corresponding thinning ratio).
But don’t be discouraged at all, we’re going to put it all together right now!
First let’s quickly go over the benefits and drawbacks of higher and lower pressure, then we’ll dive into the step-by-step process you need to take to assess where your perfect air pressure might be…
The Benefits And Drawbacks Of Too High Or Low Airbrushing Air Pressure
Assuming all other airbrushing variables remain equal, including paint type and thinning ratio, the impact of different pressures can be summed up as follows:
| Variable | Too Low Pressure | Too High Pressure |
| Paint Atomisation | The paint may not atomise properly causing spattering at best, and complete clogging of the nozzle at worst. | The more air pressure you use the better the atomisation. However you want to go as low as you can with the air pressure but still with perfect atomisation to get the best results. |
| Likelihood Of Clogging | More likely with a low air pressure as the paint is not atomised properly. | Very little chance; with enough air pressure you’ll be able to push un-thinned paint through most airbrushes. |
| Overspray | Very unlikely. | More and more likely as the pressure rises. |
| Overall Finish | Can be speckled from spattered paint, or have a more matt and orange-peel like finish. | Can drench the part causing loss of detail, runs and pooling of paint. Usually requires moderate to heavy sanding and repainting. |
| Propensity For Early Drying | Tends to make paint to on wetter, assuming you get no other low-pressure problems as outlined in this table. | Highly atomised paint can have a tendency to dry quicker, sometimes before hitting the part you’re painting causing a more matt finish. |
| Distance From Model | Will force you to go closer to the model. | Will force you to move further away from the model. |
The Steps To Figuring Out What psi Is Best For Your Airbrush
So we’ve already mentioned an effective operating range for the majority of airbrushes being between 10 and 25 psi of air pressure.
So first of all we’ll start low, so go ahead and set 15 psi on your airbrush compressor to start with and we’ll dive into the variables to see how things might change for us…
👍 RELATED: What Is An Airbrush Water Trap And Do I Need One?
IMPORTANT: This is general guidance, use it as a starting point and adjust as necessary. Ultimately you can simply start with 15psi and go straight to the spray testing section further down, however I’d urge you to go through all of the variables below as it will be immensely helpful in diagnosing any potential problems that may arise and give you greater ability to make meaningful changes for better paintwork overall. 👍
OK, let’s step through how the following variables may require a change from 15 psi.
First of all we’ll assume you’ve pre-mixed your thinners and are keeping the ratio of paint to thinners consistent.
👍 If you want more information on thinning Tamiya TS lacquer paint in particular check out this article.
Step 1 – What type of airbrush feed are you using?
Here we have the options of siphon, side or gravity feed.
This largely takes into account whether your airbrush is external or internal mix, as siphon feed airbrushes are usually external mix and side and gravity feed are usually internal mix.
- Gravity Feed: reduce by 1 – 2 psi
- Side Feed: No change
- Siphon Feed: increase by 5 psi
Step 2 – What nozzle and needle size are you using?
The nozzle and needle size can make a reasonable difference, and I’ll list three fairly standard sizes below with corresponding air pressure changes.
If you have a different size from those mentioned simply assess what the psi change might be based on what’s listed below relative to your own nozzle size.
- 0.2 mm nozzle/needle: reduce by 5 psi
- 0.35 mm nozzle/needle: no change
- 0.5 mm nozzle/needle: increase by 5 psi
Step 3 – Fine detail airbrushing or large spray area? (including distance from job)
The level of airbrushing detail you require typically goes hand in hand to a large degree with nozzle size, but even with a given nozzle size there is room to have a finer detail spray pattern and a more broad spray pattern.
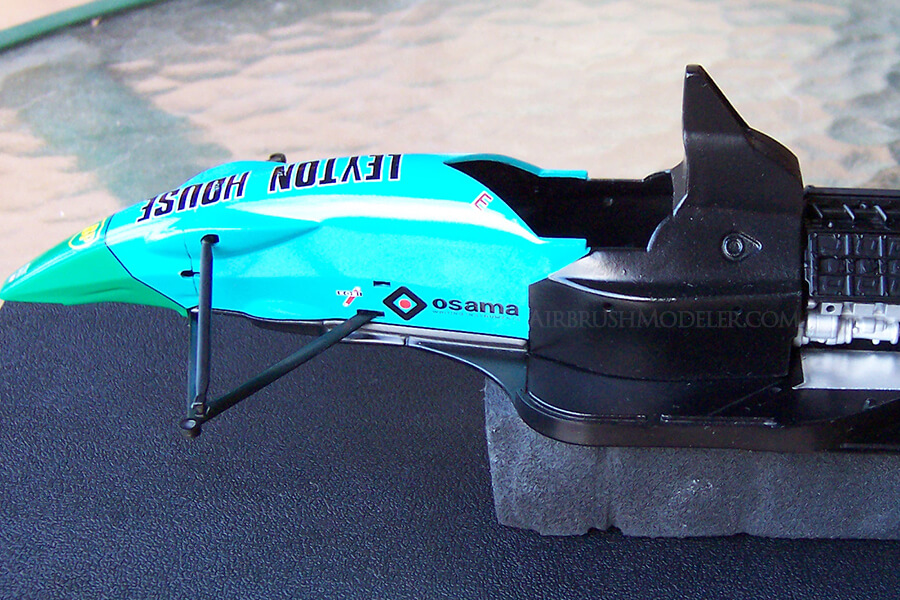
If you require finer detail and thinner lines you will be working closer to the job and require less pressure, and vice versa, if you require expansive coverage (i.e. painting a vehicle body or aircraft fuselage) you’ll need to spray from further back and use more pressure, as follows:
- Very Fine Detail Airbrushing: reduce by 2-3 psi
- Standard Airbrushing: no change
- Large Area Airbrushing: increase by 5 psi
Note: it doesn’t matter if the options you choose bring out outside of the usual 10 – 25 psi operating range. Every airbrush and setup is different, so start with what’s in the information above and table below and adjust during the testing phase. Ensure you do not go above the manufacturer recommended upper limit for air pressure on your airbrush.
See the table below for a quick reference on how to change air pressure depending on what setup and painting requirements you have:
| Airbrush Feed | Gravity Feed | Side Feed | Siphon Feed |
| Reduce by 1 – 2 psi | No change | Increase by 5 psi |
| Nozzle/Needle Size | 0.2 mm | 0.35 mm | 0.5 mm |
| Reduce by 5 psi | No change | Increase by 5 psi |
| Level of Detail | Fine Detail | Standard Detail | Large Area |
| Reduce by 2 – 3 psi | No change | Increase by 5 psi |
| Max Range | 5 psi | No change | 30 psi |
Example of band alteration based on the above, for final testing
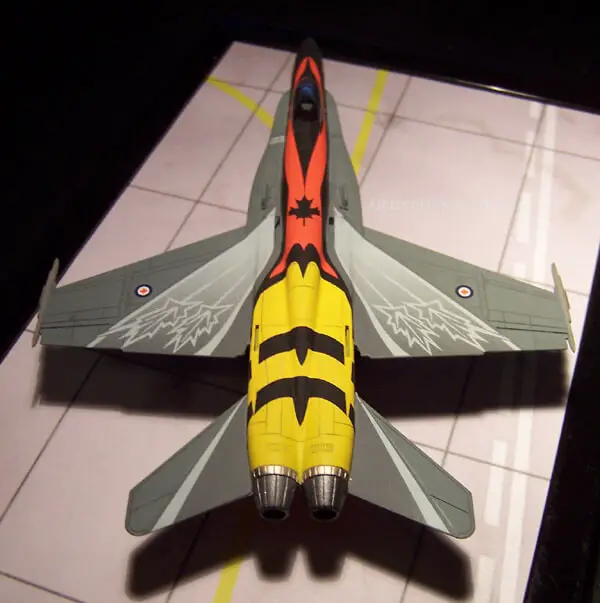
In this example I have a gravity feed airbrushwith a 0.35 mm nozzle and I want to get good coverage over a fairly large area on a 1/24 scale vehicle body.
So, starting from 15 psi…
- Step 1: reduce by 2 psi due to gravity feed – new starting pressure, 13 psi
- Step 2: no change for the nozzle/needle size – new starting pressure, 13 psi (unchanged)
- Step 3: increase by 5 psi for spraying a large area – new starting pressure, 18 psi
So we have the final starting pressure set for 18 psi for the example airbrush setup, now it’s time to on to the testing phase…
How To Test Your Airbrush Pressure For Paint Work Results
You’ve got your paint thinned and loaded, your air pressure set for your own equipment and airbrushing requirements, you’re ready to do a test run!
Grab some stiff card or an old model, anything that’s fairly uniform that you can do a test spray on.
Now simply give it a test spray and see what happens.
There’ll be three distinct things you’ll be looking for…
Spattering or No Paint Coming Out
If you experience no paint coming out, or the paint spattering out giving a speckled, blotchy or pebbled appearance, your air pressure is too low.
In this case, increase the pressure by 5 psi and test again.
You may find in this case that the paint takes a moment to clear properly with the higher pressure before it comes good and shows a nice spray pattern and good atomisation.
But, if it hasn’t cleared after a good ten to fifteen seconds of test then it’s still not enough pressure and you need to increase by another 5 psi.
From here you go through the same process again of waiting for it to clear and upping the pressure if it doesn’t clear.
A word of wisdom here…
You may find that due to the low pressure to start with that the airbrush has actually clogged fully, or at least partially.
If this is the case then you’ll need to remove the paint, fully clean the airbrush nozzle and needle, and start over at a higher air pressure setting than what you started at originally.
This is because no amount of pressure that you would normally airbrush at will unclog the nozzle sufficiently and it will likely have to be properly cleaned in order to continue testing.
So if you started on 15 psi the first time, put more paint in at the same ratio of paint to thinners after cleaning and start afresh on 20 psi.
NOTE: Don’t go past manufacturers’ highest recommended air pressure setting for your airbrush! Instead, thin the paint more.
Runs or Spidering
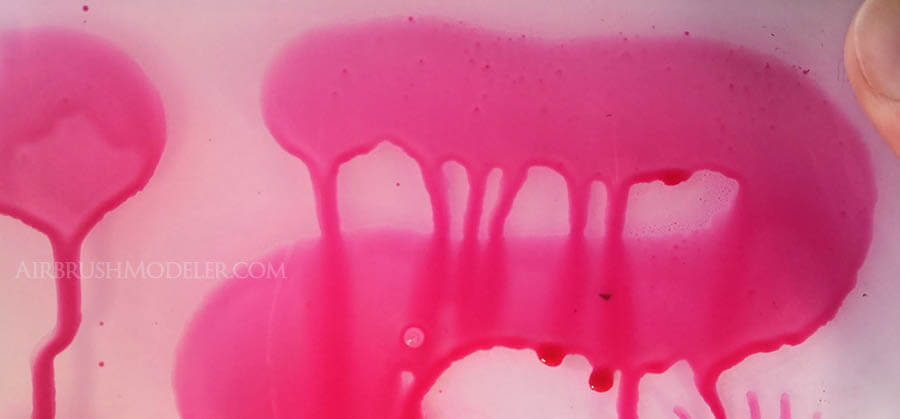
If you shoot the paint from the airbrush and it hits the surface and pools or runs then the pressure is too high.
This is also the case (usually coupled with overly thinned paint) where you get spidering.
Spidering is when paint his the surface you’re painting and the high air pressure then pushes it outwards, creating small runs fanning out from the centre – think ‘spiders legs’.
Personally I’d be a little surprised if this happens with suitably thinned paint at this relatively low pressure setting, but if it does then drop the pressure by 5 psi and try again until you get a perfect spray pattern.
Perfection!
No spattering or pebbling, no runs or spidering, just good atomisation and an excellent flow of paint coming from the airbrush with good coverage…
You did it!
Note down the particular air pressure you settled on, and get ready because we’re going one step further to get perfection!
Add Thinners And Go Back Down On The Air Pressure
The perfect air pressure setting for your airbrush and painting requirements is “the lowest pressure setting you can use and get perfect atomisation and suitable paint coverage”.
What I’m getting at here is that you can now add thinners to your paint such that it’s got a lower ratio of paint to thinners, and test spray again on a lower air pressure setting than the initial ‘perfect’ setting you just found.
My strong recommendation is to remove the paint you’ve been using and fully clean your airbrush ready to start over and load in the new paint.
If you were using a 3:1 paint to thinners ratio before (just as an arbitrary example) then use 2:1 paint to thinners for this test.
Once the paint is loaded set the air pressure at 5 psi lower than the ‘perfect’ air pressure setting you found with your original testing.
You’re looking for the same things again, spattering or clogging, runs or spidering, or a perfect finish.
Keep repeating the steps of thinning the paint and testing lower air pressures, noting down the air pressure levels as you test them.
You want to keep this process going until you get to a point where the paint is simply too thin and doesn’t adequately cover the part you’re trying to paint.
From there you’ll know you’ve gone too far and to stick with the prior test you did…
Congratulations…!
You’ve just found your perfect air pressure for the paint you’re using, the airbrush setup you have, and the type of airbrushing you need to do!! 👊😎
Parting Words
Technically it most beneficial to complete this process with every different type of paint you use, which on initial thought might seem a little onerous.
However realise that you only need to do it once for each paint type and then you’ve got it figured out forever.
And once you’ve done it the first time, making the change to different paint types or different airbrushing requirements using the same type of paint will be a LOT quicker and easier to do.
If nothing else, follow this process through completely at least once, for the paint type that you’re likely to use most often.
In the long term you’ll most definitely reap the rewards!
