
How Do You Sharpen An Airbrush Needle
An airbrush needle is sharpened by dragging or spinning it in a specific manner on an abrasive surface such as fine grit sandpaper or polishing compound, with the needle being applied to the abrasive surface at a angle to achieve a suitable point.
You may also hear the term ‘polishing’ an airbrush needle, although the terms ‘polishing’ and ‘airbrushing’ are not interchangeable.
Sharpen, of course, means to bring a sharper point to the needle, and polishing means to smoothen the needle and remove any abrasions so that you get a better spray pattern and overall finish.
Typically if you are sharpening your airbrush needle you would polish the needle as well to some degree.
Why You Would Sharpen An Airbrush Needle
A damaged airbrush needle tip will greatly benefit by being sharpened as it will provide for a better spray pattern and greater ability to paint fine details, and any additional polishing done will allow you to get less airbrush needle tip dry.
👍 For more details on tip dry, what it is and exact steps on how to avoid it, see this in-depth article.
If you’ve got a damaged and bent airbrush needle that needs fixing there are steps you must take prior to removing it from the airbrush and attempting to sharpen it.
👍 These steps are critical for ensuring you don’t damage any other part of your airbrush during needle removal, and while detailing all of these steps is beyond the scope of this particular article you can get all of the in-depth details for this process by clicking here.
IMPORTANT: If you haven’t damaged your airbrush needle then don’t play around with sharpening it, and understand that if you do attempt to sharpen it then it may backfire and your airbrush spray pattern could be degraded from what it was.
Methods Of Sharpening An Airbrush Needle
There are multiple methods of sharpening an airbrush needle including:
- Dragging and spinning the needle across sand paper;
- Dragging and spinning the needle through polishing compound;
- Using a power drill to spin the needle on something abrasive;
- Buff the needle with a Dremel or similar tool;
- Use a purpose built needle sharpener tool such as the SharpenAir;
Let’s go over each on in turn…
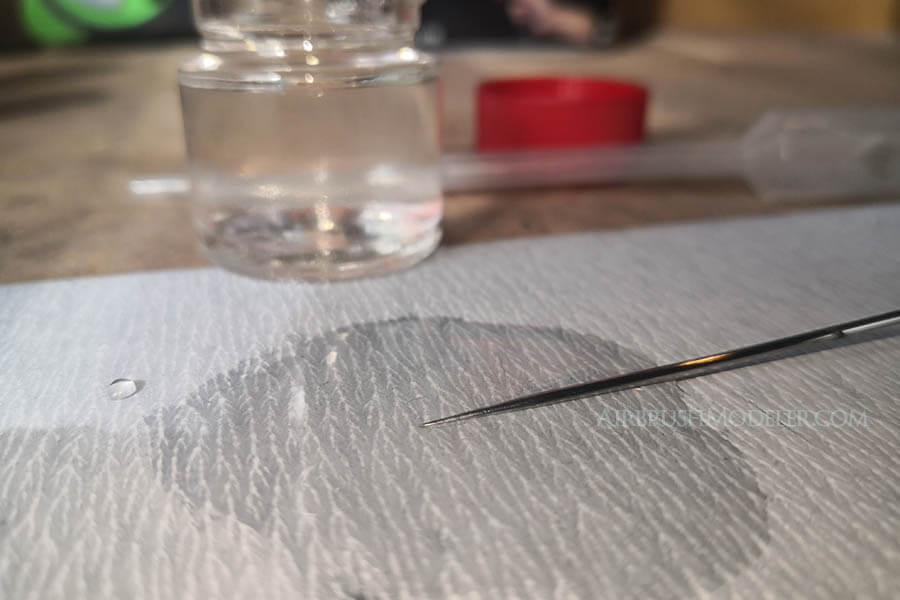
How To Sharpen An Airbrush Needle With Sand Paper
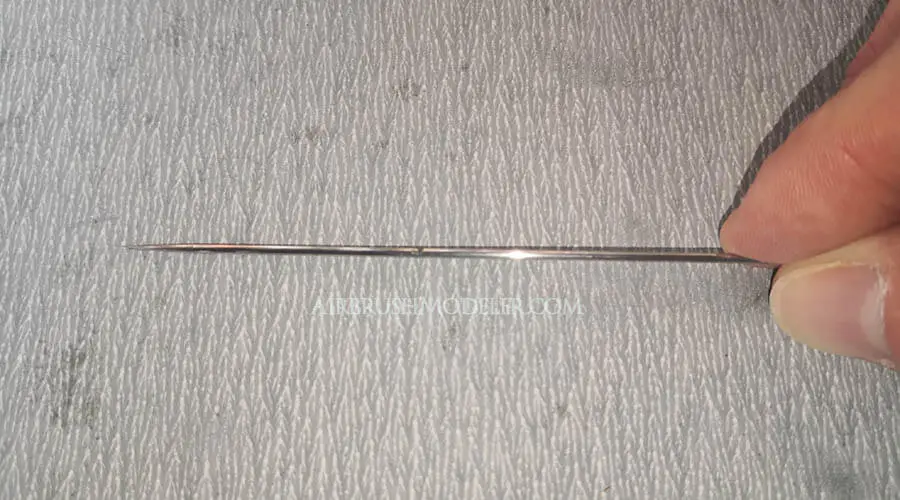
An airbrush needle can be sharpened by spinning and dragging is backwards over fine grit sandpaper.
Starting with 2000 grit sandpaper to test how your needle responds, you must keep the taper of the needle constant, which also means keeping the length of the taper the same after you’ve finished sharpening so that the spray pattern isn’t affected negatively.
Apply gentle pressure on the needle as you pull is backwards while rotating it, and test the point gently with your finger tip regularly to see if it’s getting sharper as desired.
Note that it doesn’t necessarily have to be extremely sharp and pointy as some airbrush needle, while appearing quite sharp, actually have a minutely rounded tip on them that’s not obvious to the naked eye.
To get a finer tip you can opt to complete the process again with a finer grit of sandpaper, 4000 grit for example.
On the flip side, on the off chance that the 2000 grit sandpaper isn’t giving you the results you need then you can try again with a coarser sandpaper, say 1200 grit, and start out very gently to see what results you get.
How To Sharpen An Airbrush Needle Using A Power Drill
A power drill helps to speed up the process of sharpening an airbrush needle by spinning it quickly on an abrasive surface while being gently moved backwards in successive strokes.
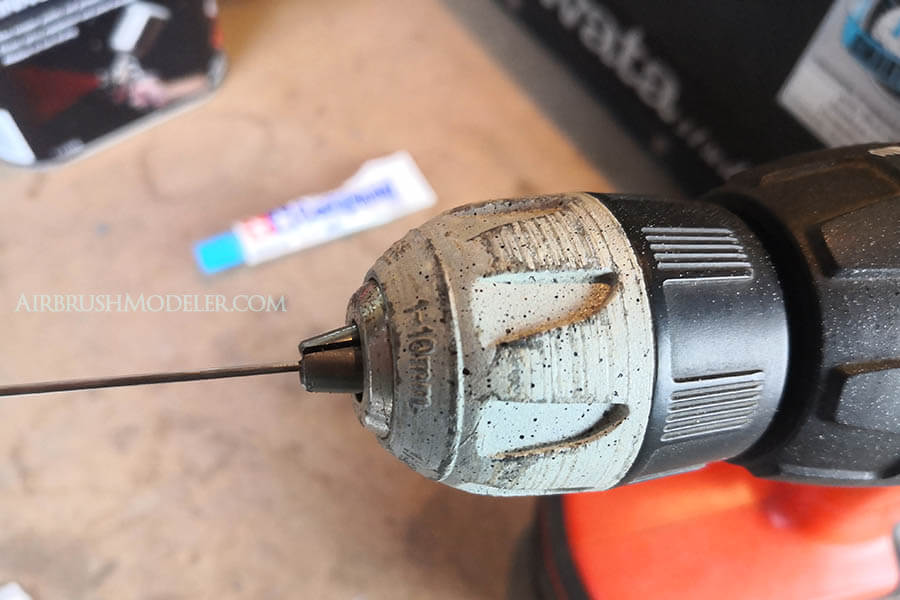
Simply insert the airbrush needle into the drill chuck and tighten it, and place the tip of the needle at an angle on wet 2000 grit sandpaper.
Spin the needle at a constant speed and gently pull it backwards on the wet sandpaper in successive strokes, placing gentle downwards pressure on the needle.
Continue until you’ve reached the desires point on your airbrush needle.
How To Sharpen An Airbrush Needle With Polishing Compound
This method of sharpening an airbrush needle involves spinning the needle on a surface covered with polishing compound.
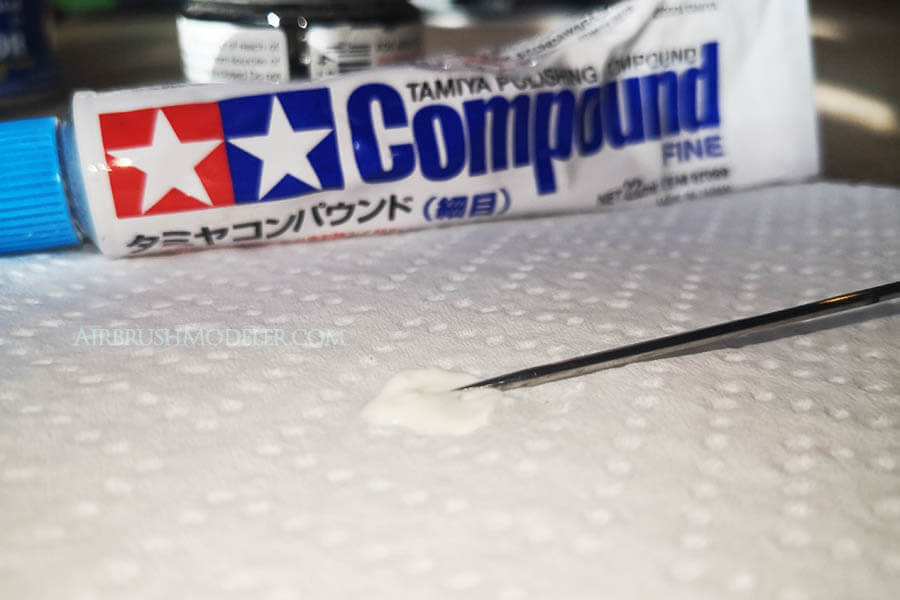
As polishing compound will usually be less abrasive than sandpaper it will need to be put into a drill as outlined in the prior section, and spun in the compound while being moved backwards and forwards.
Place the compound on some paper towel, the airbrush needle into the compound at a suitable angle to achieve the point you want, and have the drill spin while you move it gently backwards and forwards.
You can put gentle downwards pressure on the needle but avoid being to heavy handed with this as the needle can easily bend and be ruined.
How To Sharpen And Polish And Airbrush Needle With A Dremel
Sharpening an airbrush needle with a Dremel or similar rotary tool requires putting a buffing fitting on the Dremel and spinning it on the tapered part of your needle tip.
In reality this method will polish the needle more so than actually bringing it to a point, so you should expect too much from it in terms of getting a more pointed airbrush needle.
If you use this method ensure that you start with a less abrasive fitting as you can quite easily alter the needle tip significantly in a short amount of time with a tool like this and an overly abrasive fitting on it.
How To Sharpen An Airbrush Needle With A SharpenAir
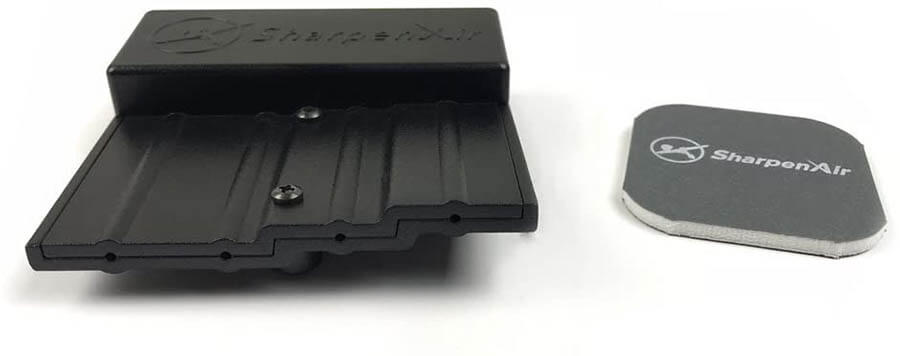
There’s now a purpose designed and built tool called a SharpenAir which is specifically for straightening bent airbrush needles.
The video below, by the makers of the SharpenAir, explains quickly and simply how to use the SharpenAir.
 | SharpenAir Airbrush Needle Sharpener |
This product works extremely well at fixing bends in airbrush needles although may not be quite the full solution for putting a sharper point on your needle.
I’d urge you to check out detailed user reviews of the product by clicking here before making your purchase. 👍
Is A Sharpened Airbrush Needle As Good As New
If an airbrush needle has been damaged it is unlikely that it will be as good as new after sharpening and polishing, however you may get extremely close.
Unless you’re doing professional or extremely high detail work chances are that close enough will be good enough. 👍
Ultimately it all comes down to testing which we’ll cover shortly, but first…
The Risks Of Sharpening An Airbrush Needle
Sharpening your airbrush needle, even if damaged, can come with risks including ruining the spray pattern due to incorrect needle taper and unwanted paint flow with an over sanded needle that doesn’t seat properly in the nozzle.
Ruined Spray Pattern From Incorrect Airbrush Needle Sharpening
The taper of the airbrush needle is specifically designed to give the best possible spray pattern for that particular airbrush, and if you change the taper while sharpening you’re likely to degrade the spray pattern to some degree.
For this reason it’s worth noting the length of the taper on the needle prior to sharpening or polishing and ensuring that it’s the same when you’re done with the sharpening process.
Inconsistent Sanding Causing Needle To Not Seat Into Nozzle Properly
If the needle is not kept perfectly round during the sharpening process it may not seat properly in the nozzle.
This means that it will not seal at the nozzle, so on a double action airbrush when the trigger is pressed for air only you will also get some paint is it passes through the tiny gaps between the needle and nozzle.
Additional sanding and polishing is the only thing you can do try to fix this problem, you just have to make sure you don’t exacerbate it in the process.
Abrasion Causing Increased Tip Dry
If your airbrush needle is left with too many blemishes after sharpening it can cause the paint to grab the abrasion and stick to the tip of the needle and dry in place, causing the problem of tip dry which will degrade the airbrush spray patter.
👍 For more details on airbrush tip dry and effective methods of stopping it check out this detailed article.
Testing A Sharpened Airbrush Needle
After altering your airbrush needle through sanding or polishing you should always conduct a test to ascertain if the spray pattern and paint finish from your airbrush is suitable for your needs.
👍 Ensure that your airbrush is cleaned prior to doing any tests so that you can properly assess how the needle itself is working without any other factors affecting the spray pattern, and if you need further info on giving your airbrush a clean prior to testing check out this in-depth article on airbrush cleaning complete with picture steps.
If you’re a casual user who needs a ‘good’ finish then you’ll have more leeway to accept what is ‘suitable’ for your needs.
However if you’re doing very fine detail work then even a small amount of spray pattern degradation may mean the needle repair and work you did is not suitable at all.
If a sub-standard spray pattern is the case after a few attempts at sharpening your airbrush needle I would recommend simply buying a new needle which is not overly expensive in most cases. 👍
