
Should I Clean My Airbrush Between Colour Changes
An airbrush cup should be cleaned between colours for two important reasons:
- To avoid any unwanted colour mixing,
- To avoid clogging and dry paint build up inside the airbrush cup, paint tube and mixing chamber, and
- To avoid exacerbating any dry paint build up on the tip of your airbrush needle, a phenomenon called airbrush tip dry;
👍 For more details on airbrush tip dry and six in-depth methods of avoiding it check out this article.
Obviously if colours mix then you’ll ruin your job and set yourself back time-wise as you try to repair the work, and dried paint can degrade your spray pattern and quality of finish at best, and completely clog your airbrush and stop paint from flowing at worst.
From this it should be clear that you should at least rinse your airbrush between colour changes, if not do a moderately more thorough clean.
Let’s have a look at exactly the steps this process involves…
How To Rinse A Gravity Feed Airbrush Between Colours
To rinse a gravity feed airbrush between colours you must remove any unused paint, clean the cup out with airbrush cleaning fluid and an old rag, detail clean with a cotton tip, and flush the airbrush fully with more airbrush cleaning fluid.
Below are these steps in detail that you must take as a minimum between every colour change of a gravity feed airbrush:
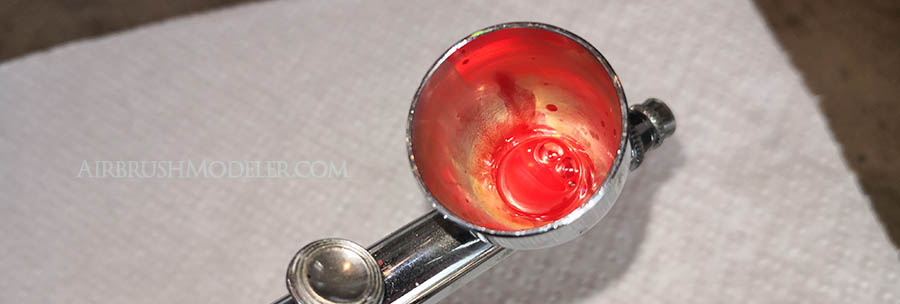
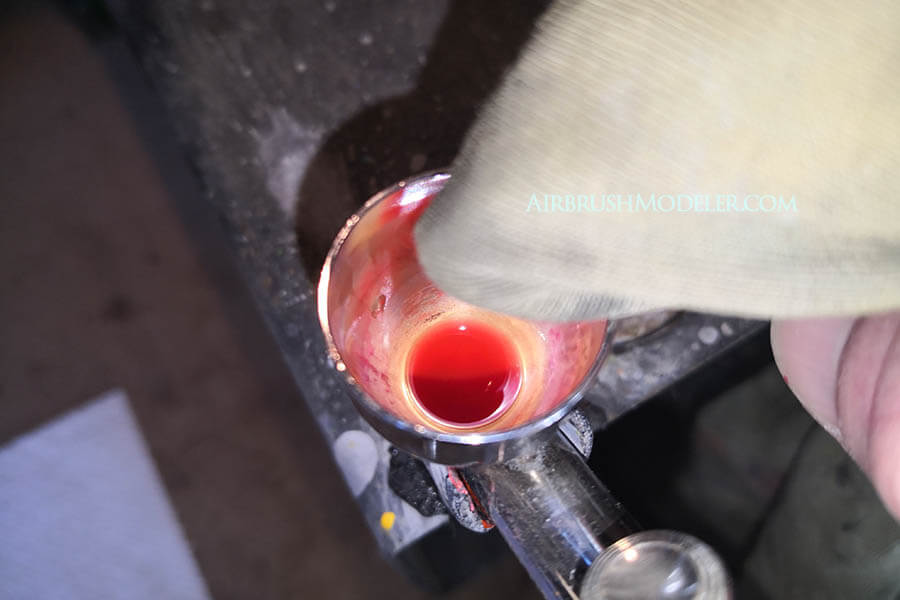
STEP 1 : Get Rid Of Any Remaining Paint
Remove any remaining paint from the airbrush by either tipping the paint out of the paint cup, or turning up the air pressure for higher flow and spraying all of the remaining paint out.
Even if you do tip the paint out it’s still strongly advisable to spray the remnants out of the system to get the airbrush as clear as possible before moving on to the next steps.
If there’s a particularly large amount of paint left in the cup when you’re done, and you know you’ll be using that colour again at some point, it may be worth tipping the remaining paint into a storage jar for future use.
STEP 2 : Add Airbrush Cleaner To The Paint Cup And Spray Out
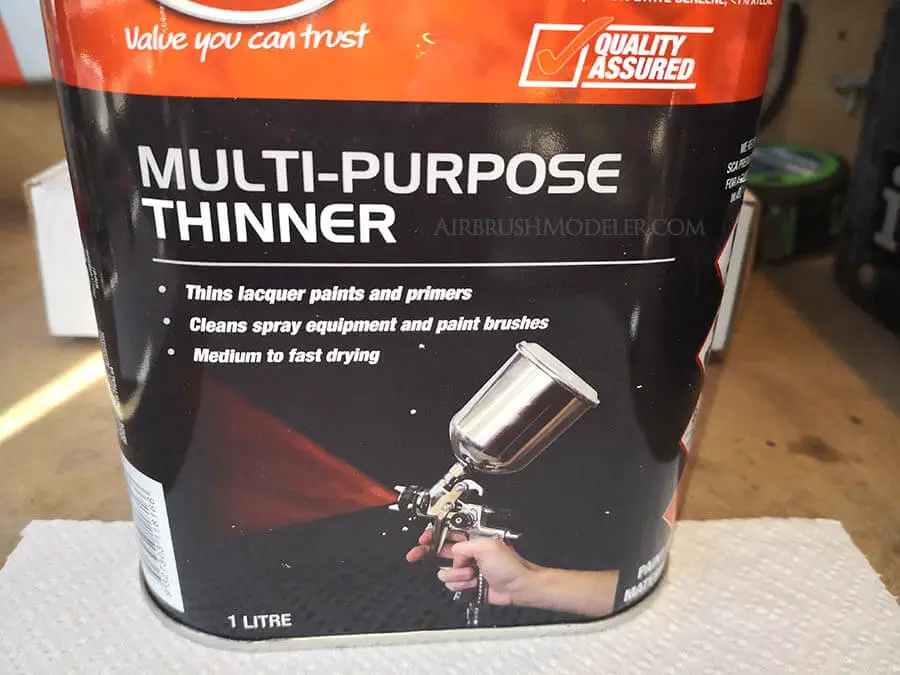
Airbrush cleaner can be a proprietary airbrush cleaning solution manufactured by the same company who manufactures the paints you’re using, but it is not limited to this.
Different paints will react with various differing degrees of success to different cleaning substances in an airbrush, but for me personally I’ll use general multi-purpose thinners as it’s perfectly effective on all types of acrylic, enamel and lacquer paints I use.
For the sake of consistency in this article I’ll refer to it as ‘airbrush cleaner’.
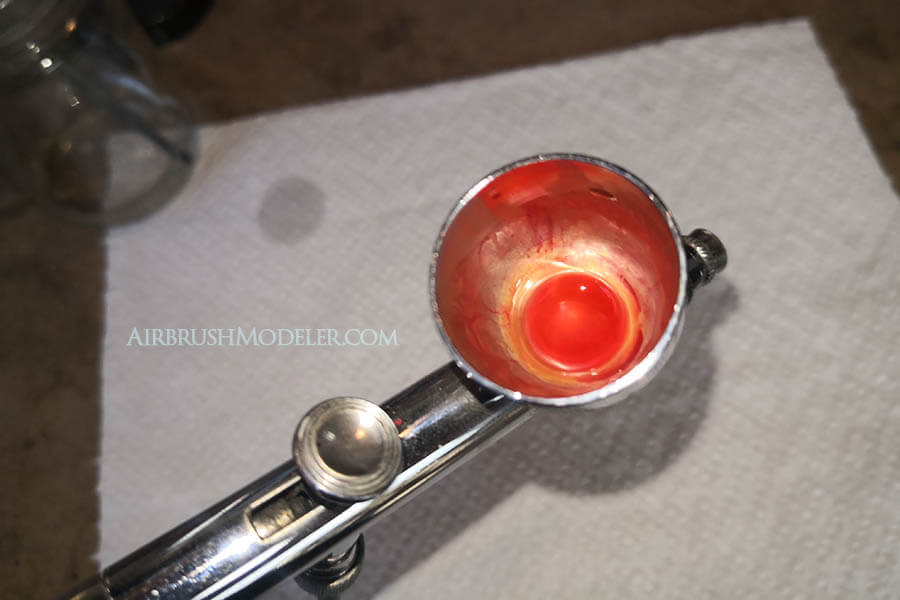
Place a couple of millilitres in the bottom of the paint cup and swirl it around to start dislodging any paint and then spray the cleaner out completely.
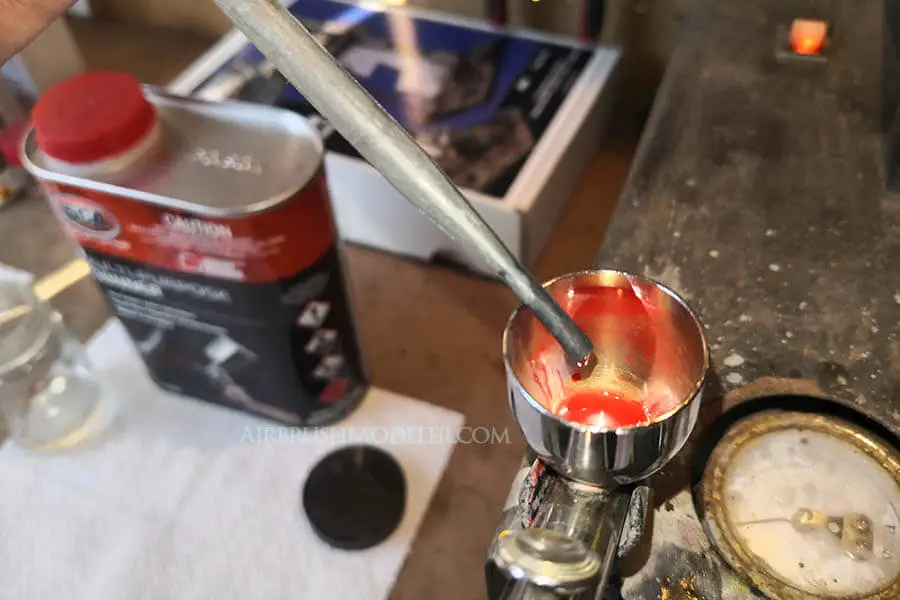
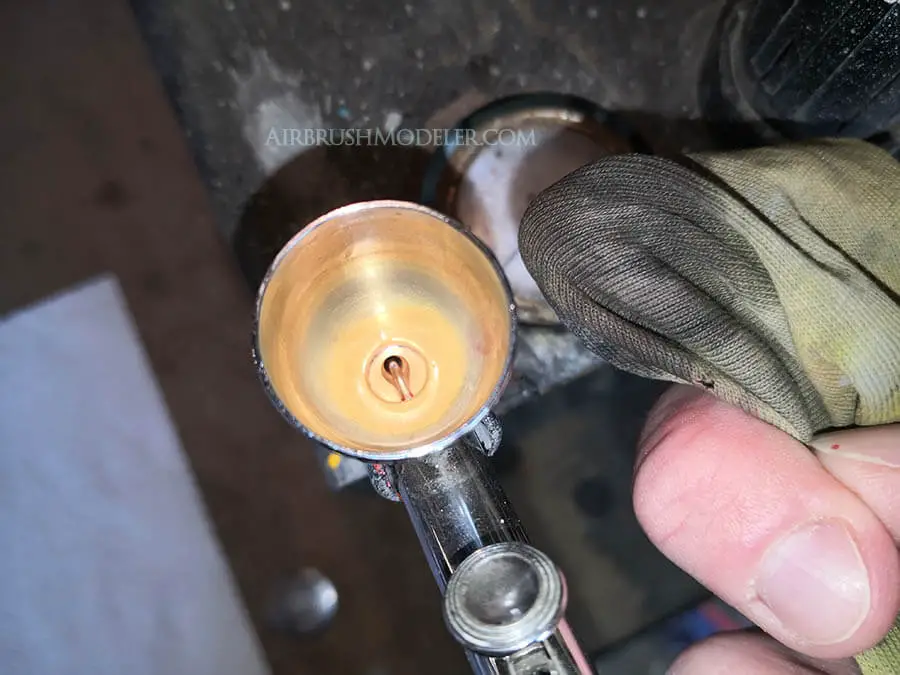
STEP 3 : Add More Airbrush Cleaner And Wipe The Cup Out With A Rag
Add another millilitre or two of airbrush cleaner and grab an old cleaning rag.
Wipe the rag thoroughly around the paint cup, soaking up the cleaner and using it to clean the bulk of the cup.
You should only be left with some paint at the very bottom of the cup where the airbrush needle passes through.
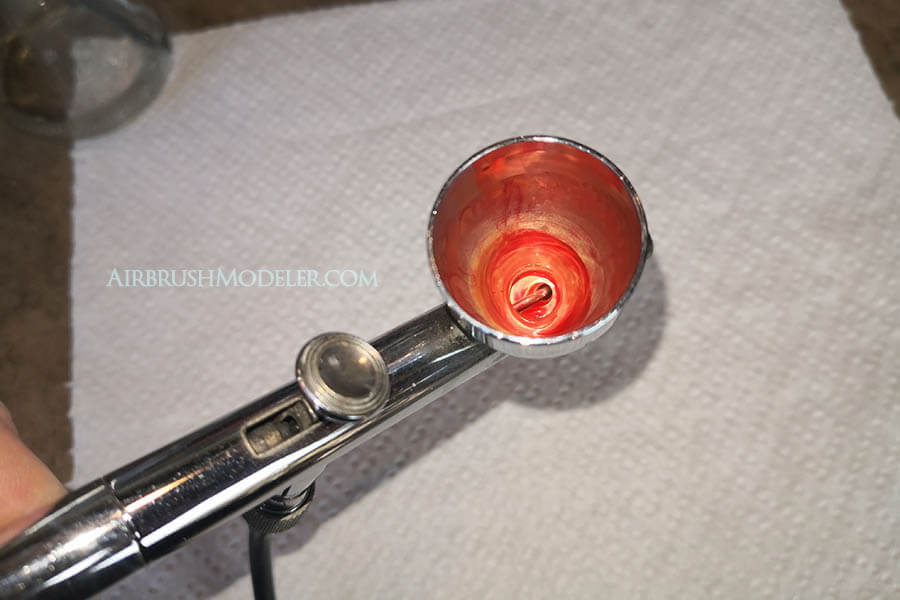
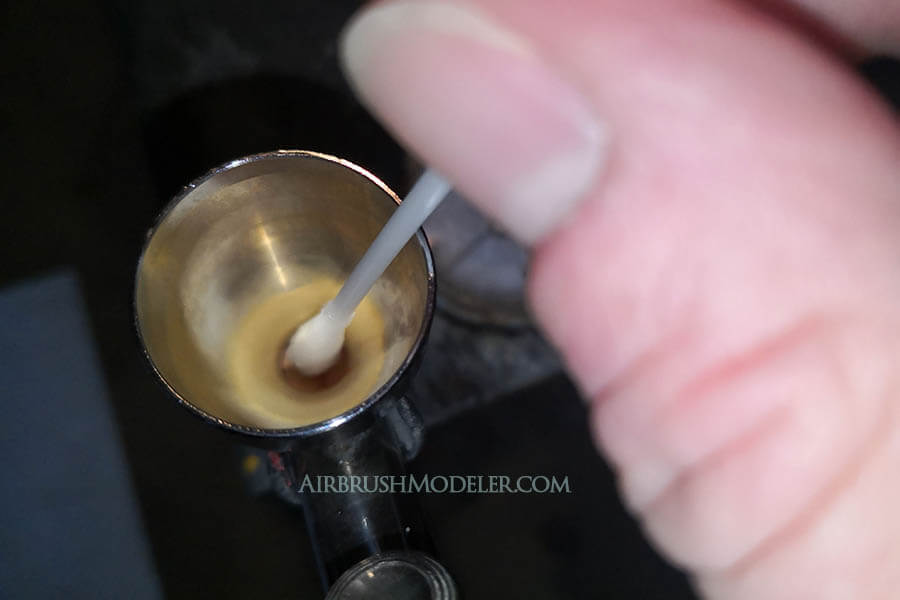
STEP 4 : Add Cleaner Again And Use A Cotton Tip To Wipe Up The Last Of The Paint
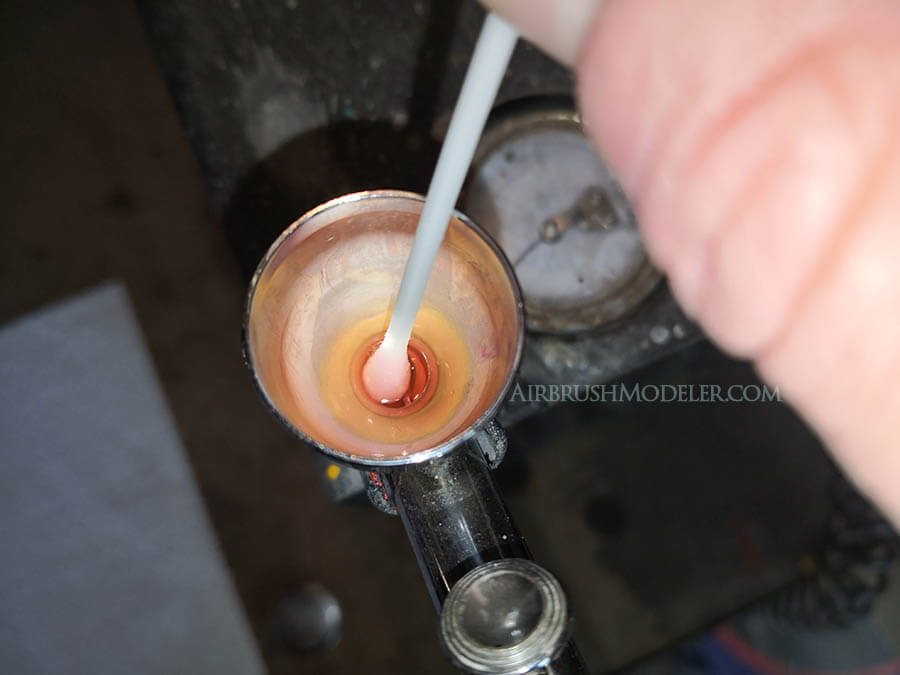
Add a millilitre of airbrush cleaner to the cup and grab a cotton tip.
Alternatively to adding the airbrush cleaner directly to the cup you could also moisten the cotton tip with it thoroughly outside of the cup, or do the lazy thing like I do and simply dip the cotton tip into the airbrush cleaner container itself. 😎
Then take the cotton tip and with reasonable pressure wipe it around the bottom of the cup and the airbrush needle to dislodge and remove any paint remaining in the bottom.
It may help to use a small old paint brush to loosen and agitate the paint at the bottom with a little airbrush cleaning fluid added in before using the cotton tip, and you’ll know if this is required if and when the cotton tip isn’t being 100% effective.
STEP 5 : Add Airbrush Cleaner To The Paint Cup And Spray Out
Again add a millilitre or two of airbrush cleaner to the paint cup and swirl it around to mix up any paint that’s left over, which may or may not be considerable even at this point.
The spray the airbrush cleaner out entirely.
STEP 6 : Repeat Steps 3 To 5 As Needed To Rinse Thoroughly
You may need to repeat these steps a number of times to get the paint cup clean and the paint tubes fully rinsed.
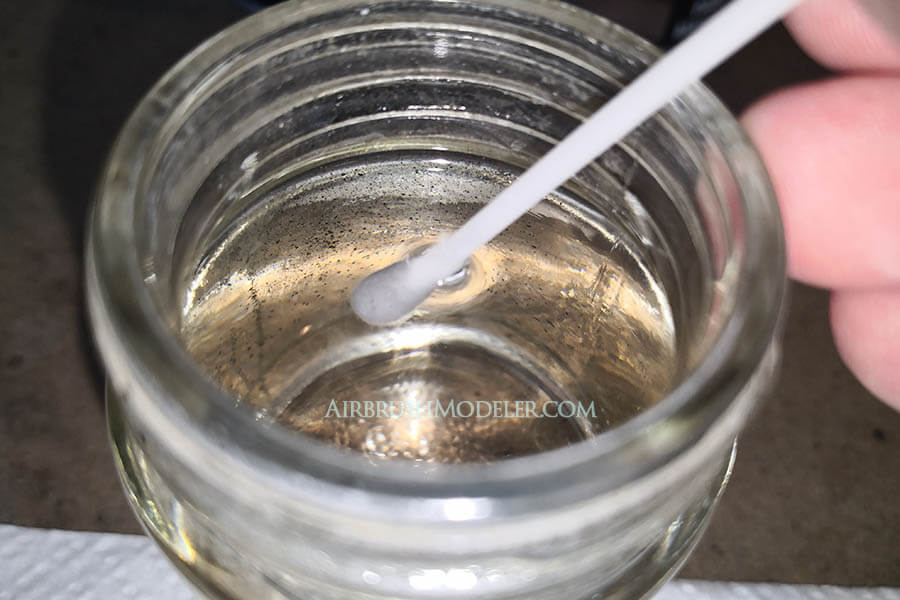
Simply continue repeating the steps until you can spray the airbrush cleaner out onto a paper towel or similar, and it shows no colour remaining at all, and you can see no paint left in the paint cup. 👍
IMPORTANT: There is a chance that this may not be thorough enough to clean out the bottom of the paint cup and paint tube completely, and if this is the case then you’ll need to do a slightly more thorough clean, and truth be told a basic rinse is probably not enough between colour changes in my experience.
Read on to find out how to properly clean a gravity feed airbrush between colour changes! 👊
How To Clean A Gravity Feed Airbrush Between Colour Changes More Substantially
To properly clean an airbrush between colour changes you must remove the unused paint and clean the paint cup with airbrush cleaning fluid and an old rag, then remove the airbrush needle and clean it, followed by detail cleaning of the cup and nozzle cap with a cotton tip before giving it a final flush with airbrush cleaner.
So as you can see, proper cleaning of a gravity feed airbrush between colour changes involves not only cleaning out the cup, but also properly cleaning the airbrush needle and nozzle cap.
This does not mean a full dismantling and thorough deep clean, but you will be required to remove the needle to ensure you’ve properly flushed out all vestiges of old paint to avoid problems that could really ruin your paintwork moving forward.
Steps 1 to 3 of properly cleaning your gravity feed airbrush are the same as the rinse process outlined above, however we’ll go over them briefly again so nothing slips through the cracks…
STEP 1 : Get Rid Of Any Remaining Paint
Either tip the paint out and spray out the rest, or simply spray all of the remaining paint out.
Which method you use is irrelevant, but remember that it works quicker and more thoroughly if you use a reasonably higher air pressure to spray the unused paint out.
STEP 2 : Add Airbrush Cleaner To The Paint Cup And Spray Out
Put a millilitre or two of airbrush cleaner into the cup and swirl it around to dilute and mix up as much paint as possible.
On the higher pressure setting spray all of the airbrush cleaner out of the airbrush.
STEP 3 : Add More Airbrush Cleaner And Wipe The Cup Out With A Rag
Add some airbrush cleaner again, a millilitre or two will do, and use an old cleaning rag to wipe out the cup as thoroughly as possible.
The rag will soak up the cleaner and make it much more effective in cleaning out 90% of the cup.
Spray any remaining airbrush cleaner out of the airbrush fully when done.
STEP 4 : Remove The Airbrush Needle And Wipe It Clean
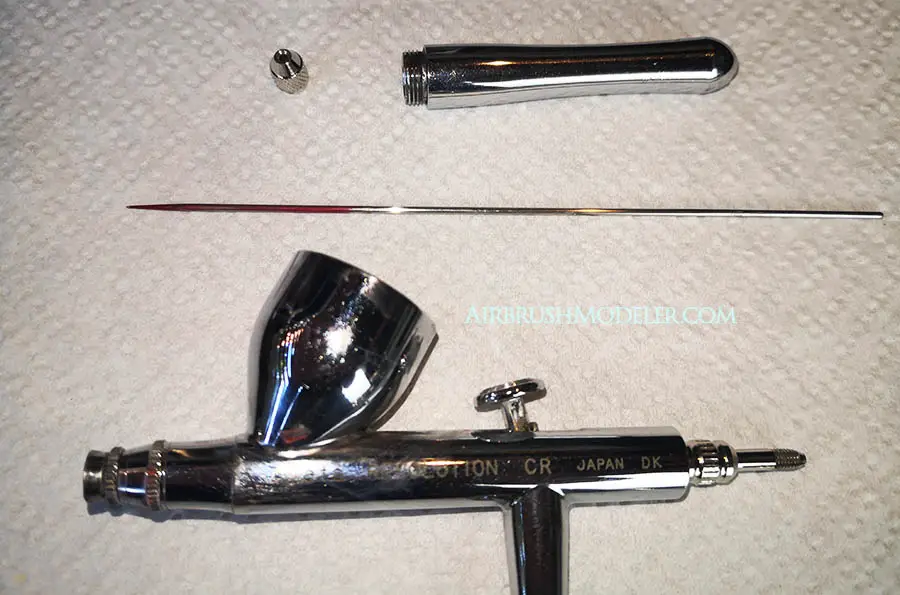
This is where we deviate from the earlier process and remove the needle for proper cleaning.
Remove the back cover of the airbrush and the loosen the locking nut that holds the airbrush needle in place.
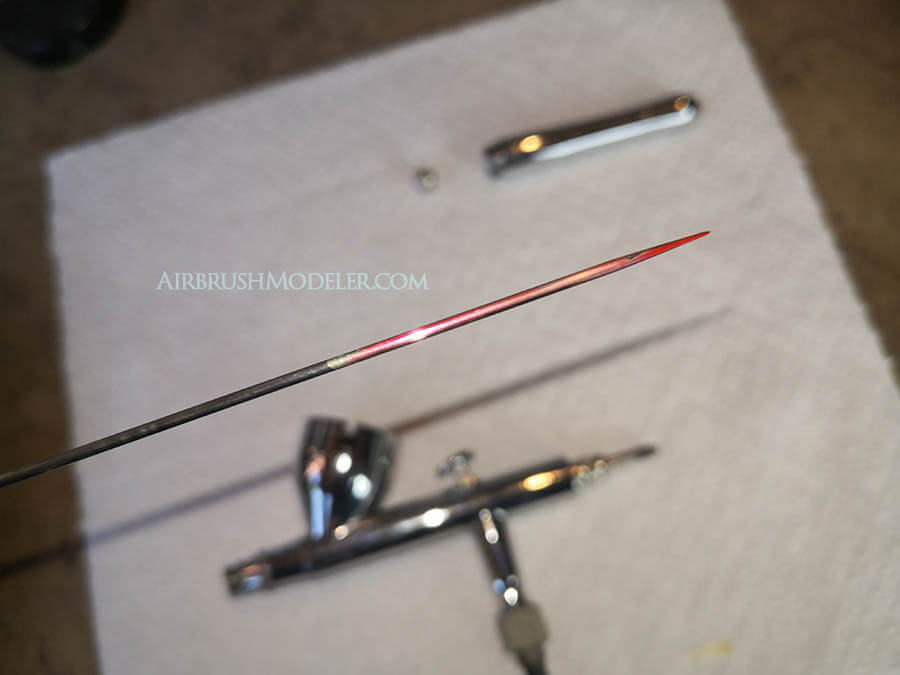
Place these pieces safely to the side and carefully remove the needle, you will most likely see some paint still left around the end of the needle.
Now you can see exactly why a ‘rinse’ is never usually enough! This is what’s left over on your next colour if you don’t clean the needle! 😮
Take the cleaning rag you used before and put a little airbrush cleaner on it, then grip the wet rag around the middle of the airbrush needle and slowly pull the needle through the rag while twisting it.
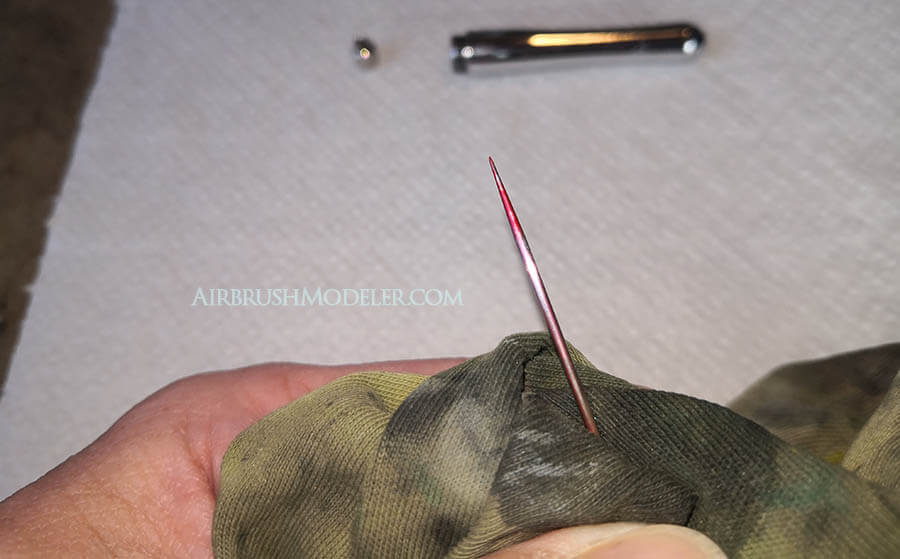
Repeat this step as many times as it takes to fully clean the airbrush needle. 👍
STEP 5 : Wet A Cotton Tip With Airbrush Cleaner And Clean Out The Cup
As before with rinsing, wet the end of a cotton tip so that it can be used to clean out the bottom of the paint cup.
There’s little point in trying to put airbrush cleaner into the cup with the needle out as it will just drain out and be useless.
Use moderate pressure on the cotton tip in a wiping and twisting motion at the bottom of the paint cup to dislodge as much paint as possible and soak it up into the cotton tip.
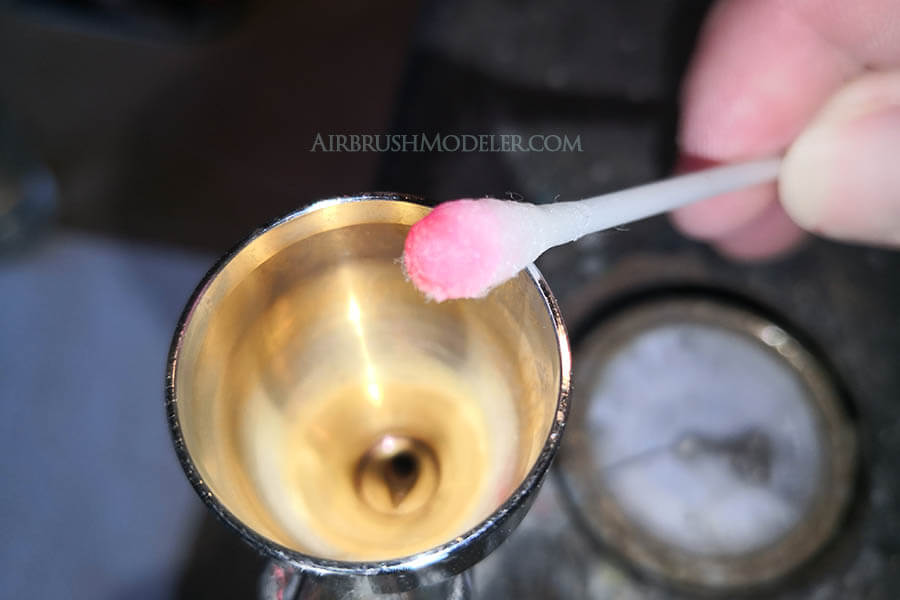
This should work significantly better with the airbrush needle removed than it did when it was still inside the airbrush.
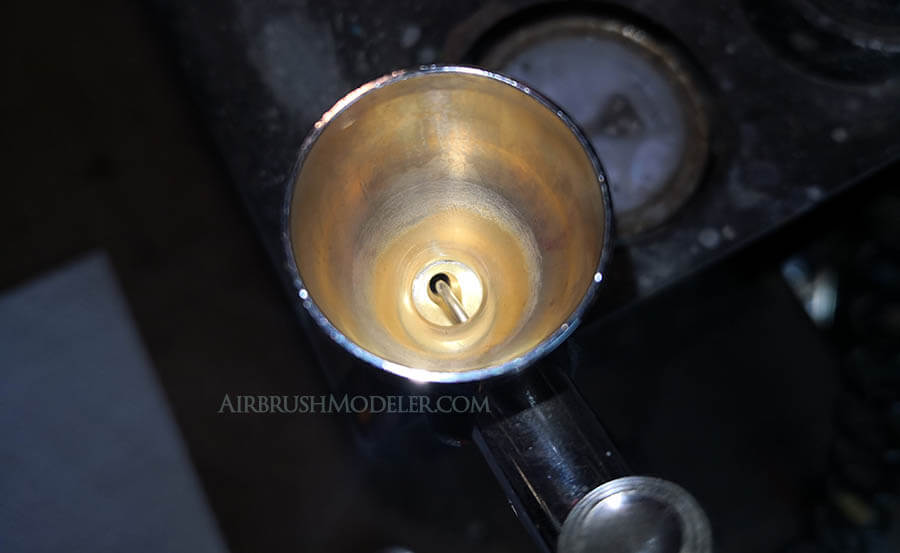
STEP 6 : Use A Cotton Tip To Wipe The Nozzle Clean

Wet the end of another cotton tip with airbrush cleaner, or the opposite end of the one you just used, and wipe out the nozzle cap thoroughly until clean.
This may need to be repeated more than once as with the other steps.
STEP 7 : Add Airbrush Cleaner To The Paint Cup And Spray Out
Add a millilitre or two of airbrush cleaner to the paint cup, swirl it around a little, and spray it out entirely.
STEP 8 : Repeat Steps 5 To 7 Until Fully Cleaned
You’ll know when airbrush is properly cleaned between colour changes when:
- The cotton tip used to wipe out the paint cup and nozzle cap doesn’t show any more colour on it, and
- When you spray airbrush cleaner through the airbrush and it’s perfectly clear.
Repeat steps 5 to 7 as many time as necessary to achieve this level of cleaning. 👍
STEP 9 : Reassemble Airbrush
Reassemble the airbrush in the reverse order that you disassembled it.
When it’s all back together I always find it a good idea to give the airbrush one final spray with a couple of millilitres of airbrush cleaner just in case inserting the needle dislodged any paint that wasn’t caught in the initial clean.
And you’re done!
Final Thoughts On Rinsing And Cleaning An Airbrush Between Colours
When you put the new colour in make sure to do a test spray on something that’s scrap to make sure you don’t have any of the old colour still in the system.
It’s highly unlikely that there will be but if you’re going to find out the hard way you may as well do so on scrap rather than the job you’ve been working so hard on. 👍
