
How Do You Use A Single Action Airbrush
You use a single action airbrush by connecting it to your pressurised air source, loading the airbrush with paint, and simply pressing the trigger directly down to spray paint onto your job, there is no complicated dual-motion of the trigger as you would find in a double action airbrush.
Single action airbrushes are typically much more simple than double action airbrushes, but first let’s do a quick recap on exactly what a single airbrush is and how it differs from a double action airbrush before diving into the steps on how to use one…
What Is A Single Action Airbrush
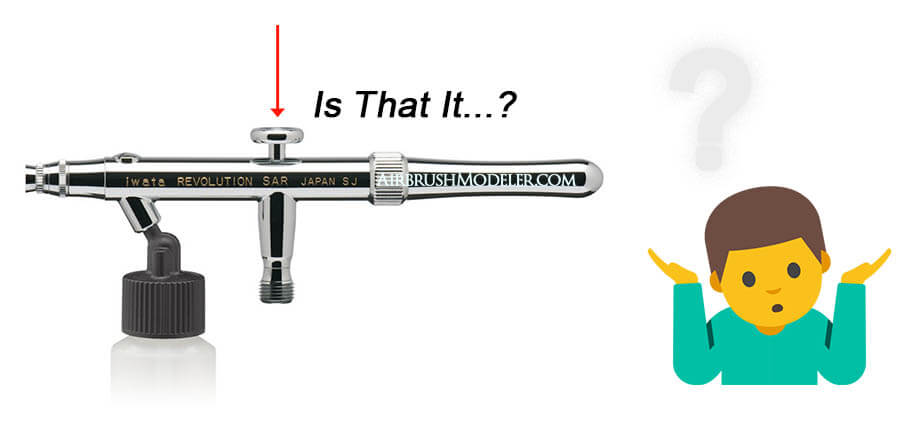
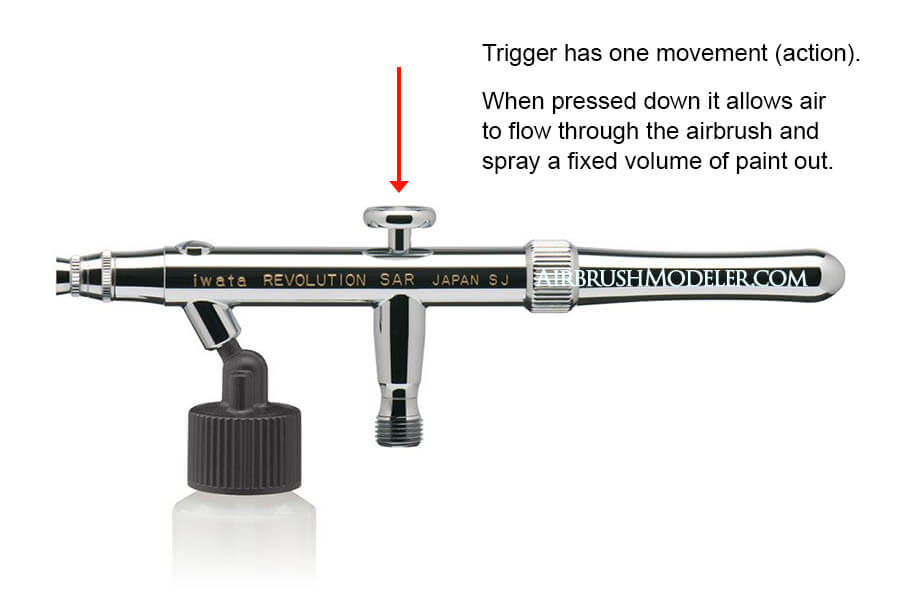
A single action airbrush is one that has a trigger mechanism that only moves in one distinct way in order to get paint spraying onto your job.
This is in contrast to a double action airbrush which has two distinct movements of the trigger, pressing down to get the air flowing, and pulling back to get the paint flowing.
👍 For more advanced details and tutorials on how to use a double action airbrush check out this in-depth article.
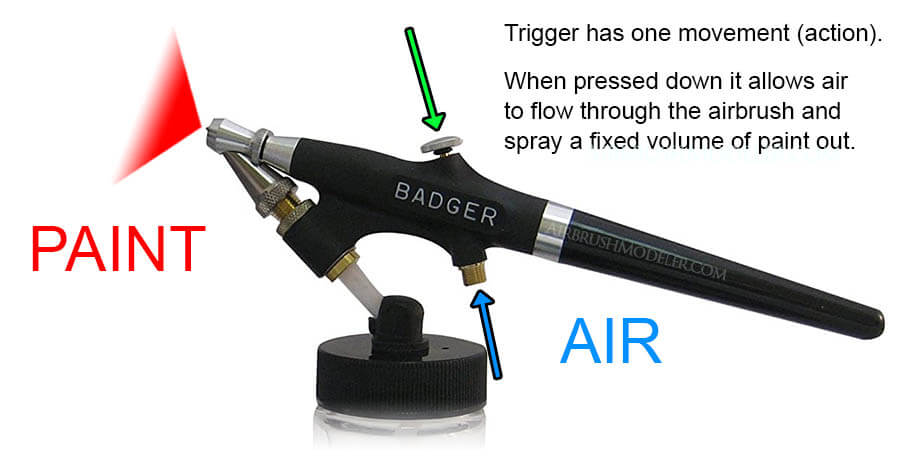
The single action airbrush is simpler as pressing down on the trigger gets the air flowing and the design of the airbrush is such that it will then automatically handle the paint flow perfectly for you.
It should be noted that a single action airbrush will always be a siphon feed type airbrush as it lends itself perfectly to the process of the airbrush handling the paint delivery automatically, something that cannot be said for a gravity feed airbrush.
👍 For in-depth information on the pro’s and cons of siphon feed airbrushes relative to gravity feed airbrushes check out this detailed article.
The Best Single Action Airbrushes For Beginners
The best single action airbrush for beginners is one which comes from a reputable brand and has stood the test of time from widespread use by airbrush users the world over, and luckily you have some excellent options available to you.
To give you an idea on some of the best single action airbrushes available today for new airbrush users, check out the table below.
These airbrushes are all from very reputable brands, will last a long time if cared for and will give you exceptionally good paintwork results for many years to come!
Single Action Airbrush Model | Reviews & Current Prices | |
 | Iwata Revolution HP-SAR Single-Action Siphon-Feed Internal-Mix Airbrush | |
 | Badger 350 Single-Action Siphon-Feed External-Mix Airbrush | |
 | Paasche SI-Set Single Action Airbrush Set (w/ Three Paint Flow Heads) | |
👍 If you’re curious for more in-depth information on all of the different types of airbrushes available check out this excellent and detailed article which outlines all of the major types and categories of airbrush.
How To Use A Single Action Airbrush
A single action airbrush sprays paint onto your job by simply pressing down on the trigger mounted on top of the airbrush body, this gets the compressed air flowing and the airbrush then takes care of getting the paint to flow for you.
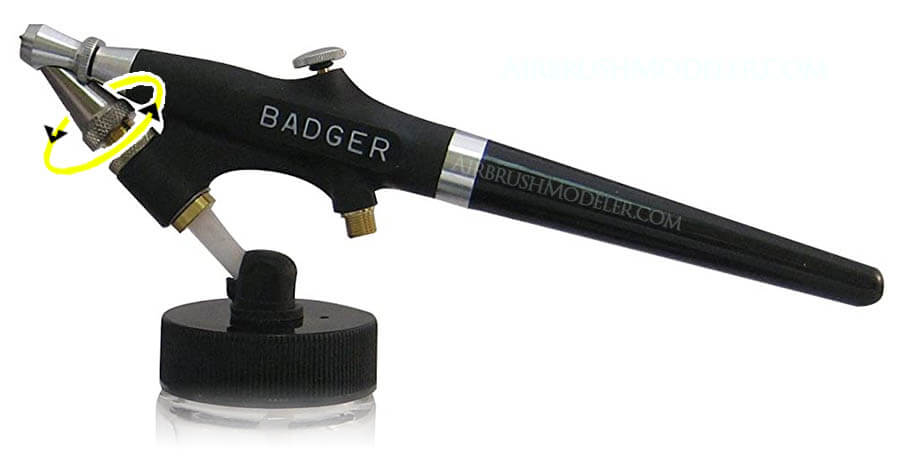
The volume of paint that sprays out of the airbrush can usually be adjusted however this has to be done manually by turning a knob on the airbrush body rather than manipulating the trigger assembly as you would when using a double action airbrush.
Let’s take a look at the steps to getting the best paint work out of your airbrush…
How To Practise Using A Single Action Airbrush (Steps)
When practising using a single action airbrush it’s always best to start on something disposable such as a plastic container lid, plastic spoon or an old scrap model kit if you have one.
If you’ve not used a single action airbrush before it’s best to make mistakes and learn the hard way on something you can throw away rather than your prize artwork project or scale model build.
Just be aware that the finish and paintwork will differ significantly if you’re spraying onto something porous like wood or cardboard, and you will not get runs or spidering as easily as you would on a non-porous surface.
For this reason, I recommend starting your practise on a non-porous surface so you can see the challenges early, get past them early, and improve your airbrushing in the quickest time possible.
INSTRUCTIONS
Step 1: Load Suitably Thinned Paint
Start by loading your suitably thinned paint into your airbrush jar and securing the jar to the airbrush ready to paint.
👍 If you’re just starting out with airbrushing and need help with how to perfectly thin your paint, check out this detailed article on the subject.
Alternatively you can also buy pre-thinned paints ready for airbrushing if you want to skip the ‘thinning’ process in order to make the learner curve a little easier to navigate while you’re starting out.
If you’re using a compressor with a pressure regulator set your pressure to 20 psi, which is a good general pressure setting that almost every airbrush will work well with.
👍 If you want more details on compressors for airbrushing and what features they come with check out this massively detailed and helpful article on how to choose the best airbrush compressor.
Step 2: Initial Test Spray
Point the airbrush at the surface you’re going to do a test spray on, holding it about two to three inches away.
Then push the trigger all the way down while slowly moving your hand from side to side, and on each successive sideways pass shift the airbrush down a little so that you’re essentially trying to paint the entire surface.
What you’re doing here is simply getting a feel for how much paint comes out and how it goes down on the surface given how far away you’re holding the airbrush.
This step is purely so you can get an initial feel for how it works and you shouldn’t worry about getting any runs in the paint or inconsistent results.
Step 3: Second Test Spray With Maximum Paint Flow
Now it’s time to adjust your airbrush to get the maximum paint flow possible from it.
Most airbrushes have a slightly different method of achieving this, however on your particular airbrush there will likely be a part that you can twist to get a greater or lesser amount of paint to spray when you push the trigger down.
Have a quick check of the instructions that came with your airbrush and set it so that the maximum amount of paint will flow, and then do a second spray test just like you did the first time.
You’ll find the paint goes on much thicker and you may need to move your hand faster in order to stop it running or pooling on the surface.
What you’re trying to achieve here is a feel for how your airbrush sprays when maximum paint flow is set.
Once you’ve painted a reasonable portion of the surface move onto the next step…
Step 4: Third Test Spray To Intentionally Make The Paint Run
In this step you’re going to intentionally experience what it’s like to put down too much paint and get runs and pools in your work.
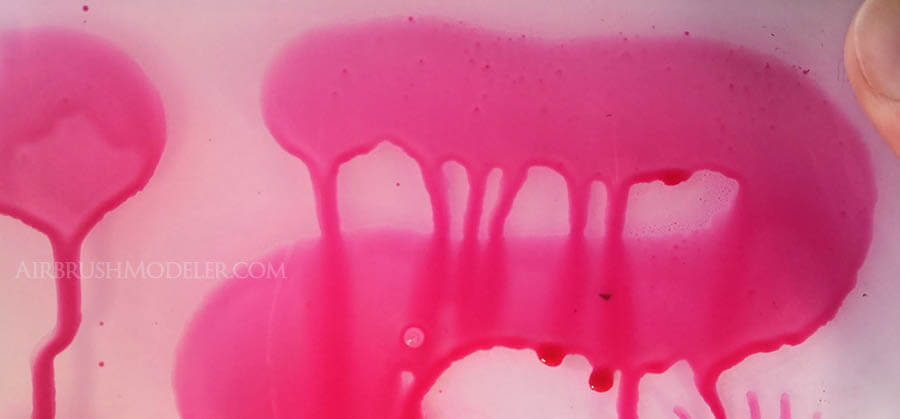
Keep the paint flow setting on maximum, hold the airbrush no more than one inch from the surface, and press the trigger all the way down.
Very slowly move the airbrush sideways, slow enough that a lot of paint pools and starts to run.
What you’re aiming to do here is a get a feel for how much paint will cause a run when you’re airbrushing relatively close to the job.
Once you’ve intentionally created a few paint runs move on to the next step…
Step 5: Fourth Test Spray To The Point Of An ‘Almost Run’
Now you’re going to start bringing a little finesse to your airbrushing, by leaving the airbrush and compressor settings exactly as they are, and trying to spray the thickest coat of paint you can while not quite getting a run.
The aim is to get the thickest coat of paint possible and have it ‘almost’ at the point of running, but not quite.
This does take a little practise but before long you’ll definitely get the hang of it, and this is, in fact, how you want to approach a lot of your airbrushing jobs to get the very best results possible.
Note that you may need to alter the distance you hold the airbrush from the surface to get the best results, and everyone’s approach here will be a little different depending on their skill level and equipment you’re using.
But as with everything, practise makes perfect!
Step 6: Fifth Test Spray With Minimum Paint Flow
Now that you’re getting the hang of putting down heavier coats of paint it’s time to change direction a little and set your airbrush to its lowest paint flow setting and see how the paint work changes.
Put your airbrush on it’s lowest paint flow setting and hold it about an inch from the surface you’re painting.
Push the trigger all the way down and start moving your hand side to side again, moving down the surface with each successive sideways pass.
You may find that the line you paint is thinner and fainter than before, and this is to be expected.
You’re simply trying to get a feel for how the paintwork looks relative to when you’re using maximum paint flow.
After a few passes move on to the next step where you’ll be trying to paint some fine detail with precision…
Step 7: Sixth Test Spray For Fine Lines And Detail
You may have found that in the last step the line was fairly faint, something that is easily remedied.
Simply move the airbrush closer to the surface to get a clearer and stronger line, and feel free to experiment with holding the airbrush at different distance on each sideways pass to get a feel for how the resulting paintwork looks.
At this point you’ll find that the clearest line is possible at a distance that is reasonably closer than when the maximum paint flow was being used.
This is completely normal and expected.
Once you’ve found the distance that gives the clearest line, such that you can put the paint down quite thick to the point of ‘almost running’, practise painting the finest lines you can down the page.
Step 8: Practise On A Colouring-In Print-Out
Now that you’re starting to master using the single action airbrush with different levels of paint flow it’s time to put your skills to the test!
Here you’re going to improve your skills at positioning the airbrush to paint within the lines of a basic drawing, much like kids do when they’re learning how to use crayons etc.
Click on the image below to download and print the drawing.
The image was accessed at no charge form this website where you can get more pictures to practise on. 👍
My recommendation is to paint different colours on adjacent sections to get a better feel for how you are progressing and what your skill level is.
When you start a section, turn the paint flow right down and get in close with the airbrush to paint a crisp fine line right on the edges of the section, and adjust the paint flow to be larger when you start to fill in the section entirely.
Colour in the entire image in this way and you’re done! 👊
Step 9: Continue Practising On More Challenging Colouring-In Print-Outs
Once you’re proficient at colouring in the picture above you can advance onto more technical pictures.
Again, visit this website to access free colouring in pictures to use your airbrush on and choose any ones that take your fancy! 👍
Final Thoughts On How To Use A Single Action Airbrush
Coming to grips with a single action airbrush is a relatively straight forward process and when you follow the steps above you will get quite proficient surprisingly quickly.
So don’t delay any longer, grab your single action airbrush and get started, and I think you’ll surprise yourself at just how quickly you get good at it! 😎
