
This article will give you a visual demonstration of using slightly different methods of priming, preparing a primed piece for a top coat of paint, and assessing which method is best for painting scale models.
How To Airbrush Primer On Models
It can sometimes be hard to see how good (or horrific) the primer coat is, and I must admit I’m guilty of just assuming I did a good enough job when in fact there was a lot left to be desired, as you’ll see below…
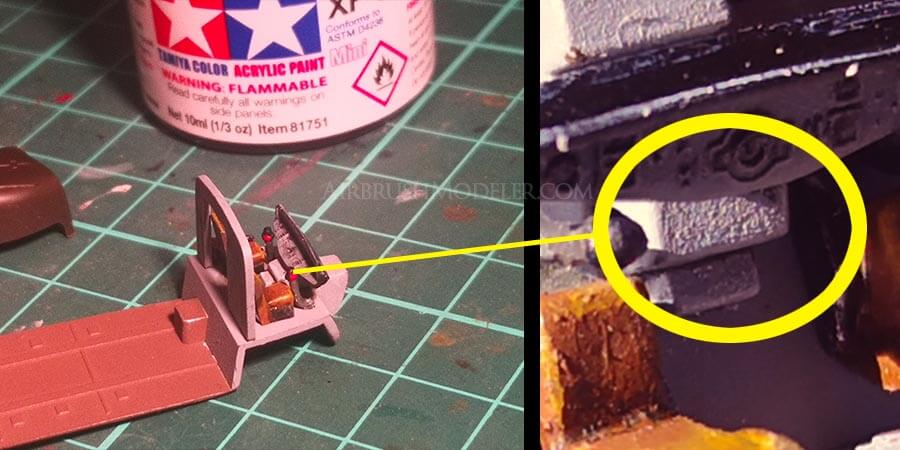
Case in point, this 1/144 scale CH-53 helicopter kit was primed and then had some detail painting applied to it (something I’m still trying to master…🙄) without bothering to put an additional top coat of light grey on it (not that this was a problem, it will hardly be seen when the cockpit is inside the body of the chopper).
To standard eyesight it looks respectable enough, but when you get a macro shot you can see truly horrendous quality priming that the naked eye has a hard timing seeing.
Note that there was no sanding of this part, a wash of sorts has been applied and the lighting and shadow contrast was very strong, and all of these are the reasons the roughness stands out so well.
I was in a rush to get the primer on in this case and didn’t bother to do any sanding, and it shows.
Again not a big problem given it won’t really be seen when the kit is built, but it illustrates the point that if you don’t pay attention to your priming you’ll endure problems that will only compound as your build and top coats, decaling and sealing coats progress.
First let’s take a look at what type of primer we’re going to use…
What Is The Best Primer For Scale Models
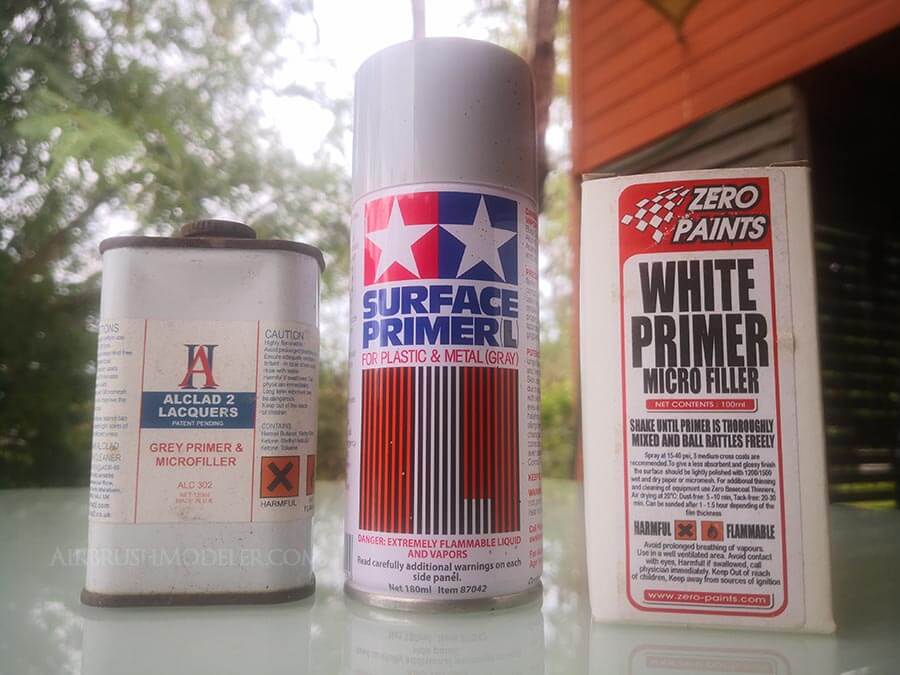
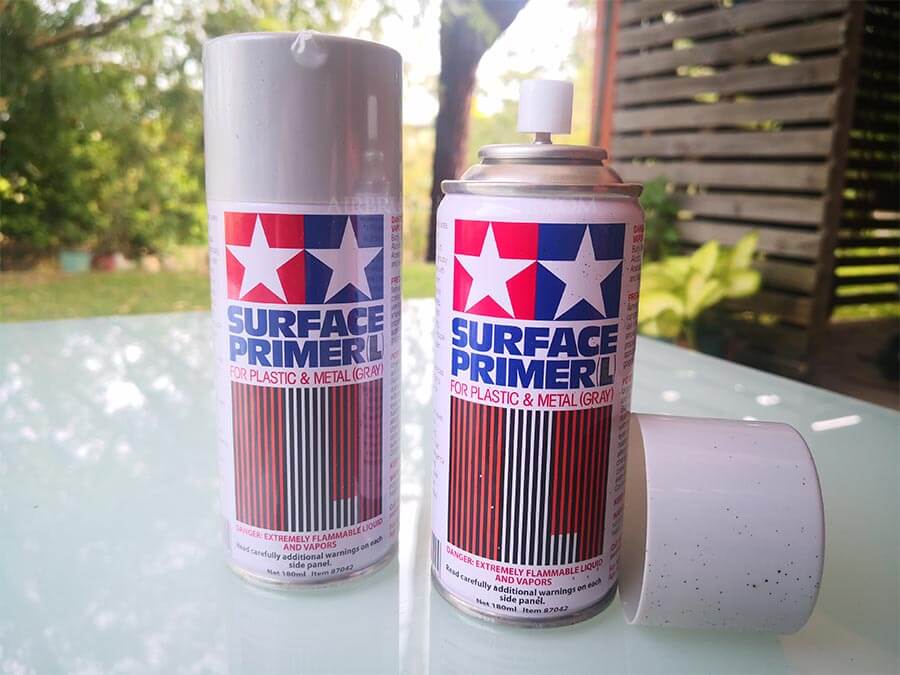
My personal preference is for Tamiya primer as that’s what I’ve used the most given it’s so easy to get.
You could debate whether that’s actually the very best primer for scale models on planet Earth, but one thing I can guarantee is that it’s most definitely not the worst and is at least in the ‘very good’ category.
So, that’s what we’ll use in this test and ‘How-To’.
👍 For reviews and prices of Tamiya Primer click here.
How To Decant Tamiya Primer For Airbrushing
Just to clarify, you’ll be seeing examples below of primer being used straight from the can and also from the airbrush with different thinning ratios.
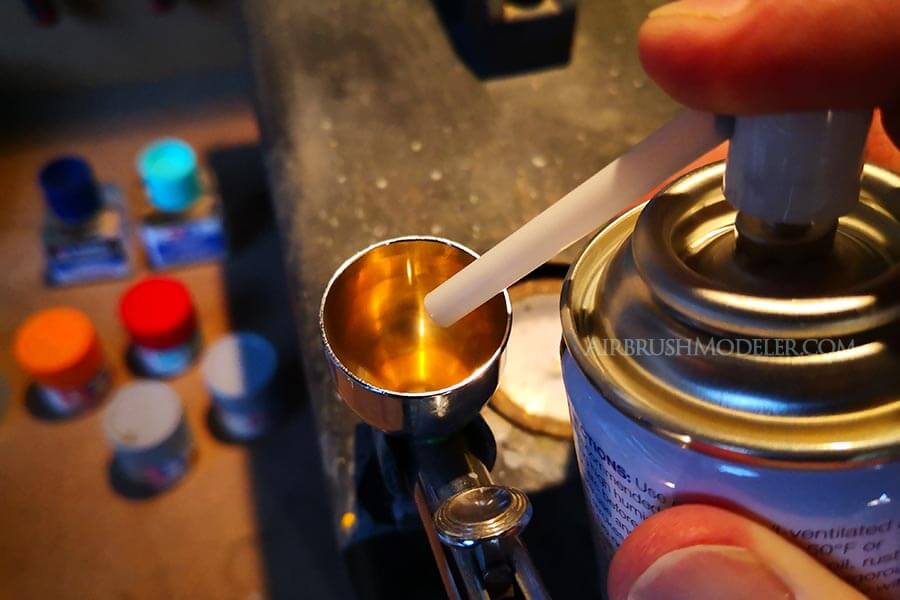
I decant Tamiya primer into my airbrush the same way I decant any other type of paint, and that’s by using a specially cut straw (shown above) to make the task exceptionally easy, fast and with very little clean-up required.
👍 For a detailed Step-by-Step article (including pictures) on this process with everything you need to know, including how to deal with the paint gassing out prior to airbrushing, check out this link.
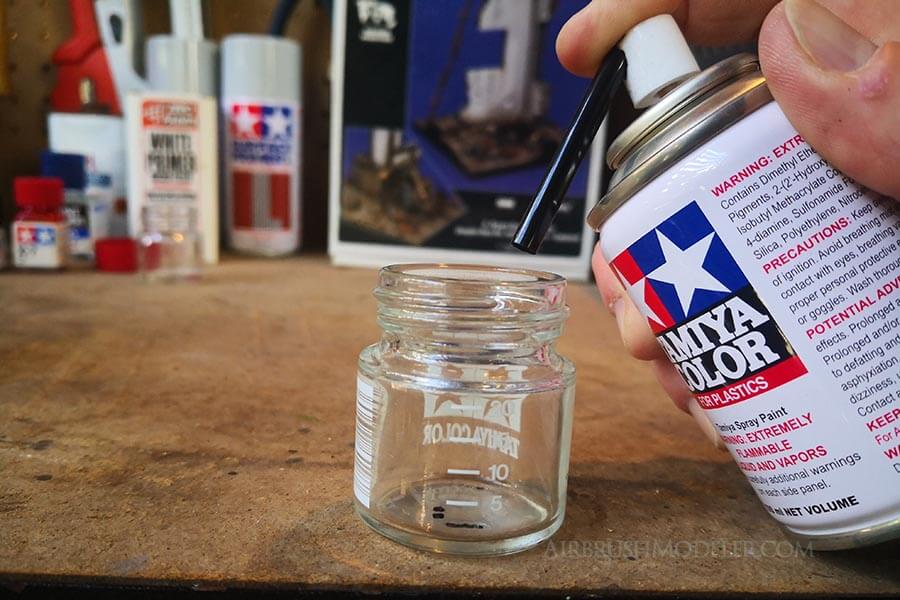
For super fine tuning (and potentially better mixing) of your paint or primer, consider decanting into a mixing jar such as the one you see below.
👍 To see reviews, availability and current prices of these handy mixing jars click here.
I won’t bog this article down with additional decanting instructions (use the link above 👍), rather let’s dive straight into how I thinned the airbrushed primer on both examples I conducted.
How To Thin Tamiya Primer For Airbrushing
What’s the perfect thinning ratio for Tamiya primer, a simple question with perhaps a not so simple answer.
👍 It will be somewhat dictated by the equipment you’re using, and for a very detailed and helpful article on perfectly thinning your paint for airbrushing click this link.
However…
Rather than beat around the bush I’ll just tell you the exact (or as close as I could measure) thinning ratios I used for each priming experiment so we can examine the results using the pictures below.
For the first airbrushing experiment I used an approximate thinning ratio of 3:2, or about 60% primer to 40%.
For the second, I used an approximate thinning ratio of between 2:3 and 1:1, or approximately 45% primer to 55% thinners.
For each experiment I used Tamiya lacquer primer.
Now let’s get straight on to how these experiments turned out…
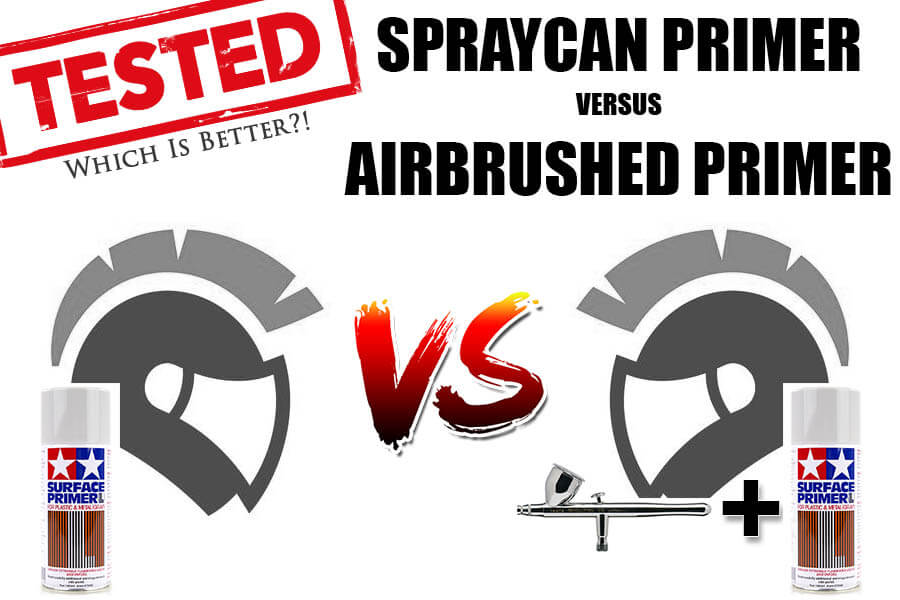
Airbrushing And Spray Painting Tamiya Primer
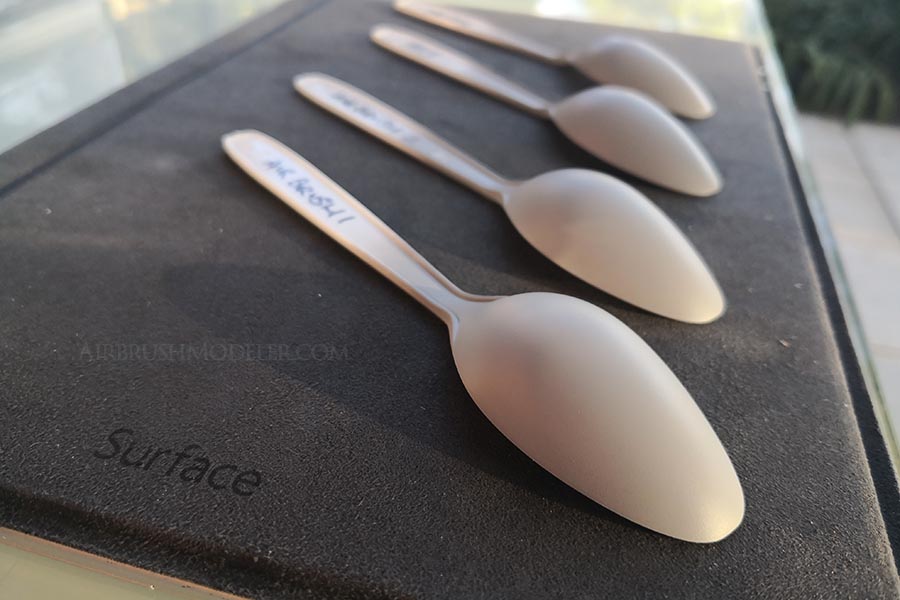
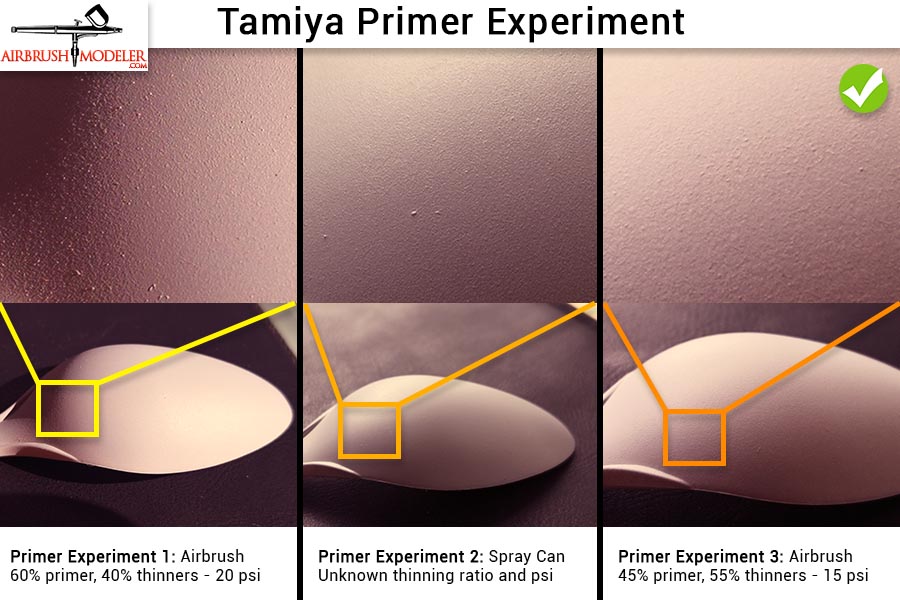
A total of three priming experiments were conducted, the first with Tamiya primer shot straight from the can, and the following two using airbrushed primer at different thinning ratios.
Quick recap:
- Primer Experiment 1: Tamiya primer straight from the spray can;
- Primer Experiment 2: Decanted Tamiya primer airbrushed at a ratio of 60% primer to 40% thinners – approximately 20 psi;
- Primer Experiment 3: Decanted Tamiya primer airbrushed at a ratio of 45% primer to 55% thinners – approximately 15 psi;
Here’s how they each turned out…
Primer Experiment 1
Straight from the spray can
I honestly expected the spray can primer to be the worst, but it didn’t start out that way, and went down surprisingly well.
You can see a little orange peel but it’s not bad by any realistic measure.
I did two mist coats straight from the can then two heavier coats for full coverage, and other than horrendous overspray and paint wastage it was a win overall.
Primer Experiment 2
Airbrush with 60% primer to 40% thinners – ~20 psi
Next came the first airbrush experiment which I expected to be better than the spray can, and I was in for a surprise.
As you can see there was not only some orange peel action going on but also some pebbling as well, likely due to the primer being a little too thick.
To look at with the naked eye you can’t really tell too much of a different from the result in the first experiment, but when you go macro it’s reasonably evident.
Ultimately this means more work getting the primer ready to take a top coat of colour.
Hopefully now you’re starting to get an idea of how this can have a knock-on effect of making your work harder and the outcome more problematic if you don’t get the very first stage of priming right.
Primer Experiment 3
Airbrush with 45% primer to 55% thinners – ~15 psi
I wasn’t actually planning on doing a third experiment however after being surprised at just how dodgy the first one came out I was determined to see if I could one-up the spray can.
I gave the airbrush a full clean and loaded the primer with the higher thinners ratio and dropped the pressure down to around 15 psi.
It was evident from the outset that the primer was more translucent and I ended up needing an extra couple of moderately heavy coats, although this didn’t cause any major problems.
As you can see in the picture the finish is better with less orange peel, and although the difference may be minor than when compared to the primer direct from the spray can I’ll take every little win I can get in order to make the build more rapid, trouble free and fun.
So… we’ve ascertained that a well thinned primer at low pressure appears to provide the best results (which is the case with virtually all airbrushing).
However there’s still one more step I go through before putting a top coat on…
Sanding And/Or Polishing Model Primer Ready For Colour
It’s always best to sand your primer prior to putting any colour top coat on.
You don’t want it to be mirror smooth as this will not give the top coat anything to bite into, but very smooth to the touch and naked eye is a good middle ground between leaving it with full orange peel and a show-shine finish.
Here’s why you want to sand the primer:
- Chances are you’re going to get at least a small amount of orange peel in your top coat, it’s almost inevitable for most modelers unless you have truly inhuman airbrushing skills. So it makes sense to have the primer reasonably smooth so it doesn’t exacerbate the orange peel you’ll get in your top coat;
- If your top coats and/or clear coats are more orange-peel’d than they need to be it’s going to much more difficult and laborious trying to get a totally mirror smooth finish as you’re working through more paint roughness;
- Again, if the top coats are more orange-peel’d than they need to be weathering the model is going to be more difficult. An example is using washes, which always work better on smooth glossy surfaces. If you try to use them on a lumpy matt surface of paint they won’t along the lines/groove/cracks as easily and will be inclined to spread through the orange-peel’d paint;
- And lastly, if the orange peel is worse than it needs to be, decals won’t look as effective when they’re put on.
Below you can see the results of using 1200 grit sandpaper from a hardware store on the spoon that was primered straight from the spray can.
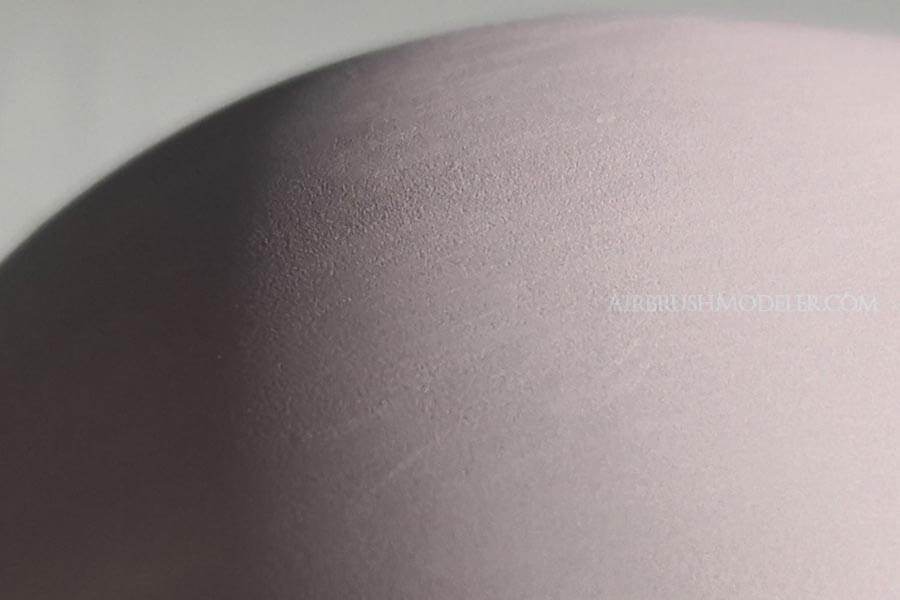
As you can see it’s not mirror smooth, nor was it intended to be.
In this macro shot you can see slight scratching from the sandpaper and some inconsistency in the roughness of the paint…
…interestingly, this is not evident to the naked eye, and no further sanding is strictly necessary.
Remember, the top coat needs something to bite into itself and this level of sanding will definitely be sufficient.
In addition to all of the above, sanding the primer enable you to get it sufficiently smooth for a top coat of colour regardless of how good or bad it initially went down.
You could have airbrushed it far too thick and left obvious orange peel and large pebbling all over the piece, but a quick sanding will make short work of the problem.
The only challenge with this comes when you have to sand the primer in parts that are extremely hard to get sand paper (or similar item) into.
For this reason, it’s worth it to always try to get the best quality primer coat down that you can.
Problems With Sanding Primered Model Parts
In the image below you can see where I’ve actually sanded a little too much and gone through to the plastic spoon underneath… not good.
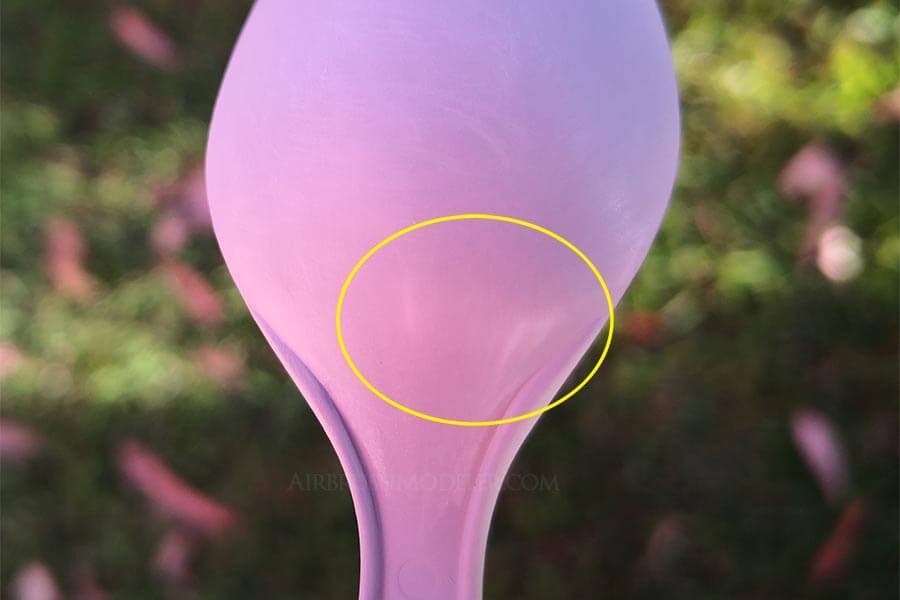
This was on the airbrushed spoon, and it in fact happened to two of the three airbrushed spoons I experimented with (I did more experiments than I’ve shown above, just fyi).
This tells me that I wasn’t airbrushing quite enough paint as my sanding was not over vigorous at all.
The primer straight from the spray can on the other hand had no such problems, probably owing to the fact that with the pressure of the Tamiya TS spray cans it’s like opening up the flood gates on a damn…
…much more paint went onto the spoon from the spray can and so made a thicker layer of primer that was more forgiving when being sanded.
The rule here, use the spray can if you want, but if you’re going to use your airbrush (especially on the small parts or those that will be hard to sand) then make sure you lay down a couple of extra layers to get a little thickness to the primer so you won’t sand through it.
Just make sure you don’t lay it down so thick that you potentially take away any detail from the part.
As always with everything in modeling, practise makes perfect!
And as for the CH-53 chopper cockpit, I’m just chalking that one up to experience and continuing on with the build.
Afterall, it’s not like anyone has “macro” vision installed in their eyes to see the interior finish anyway, and in true modeler fashion I’ll be hiding the dodgy bits from view, so I’m good to go! 😎
